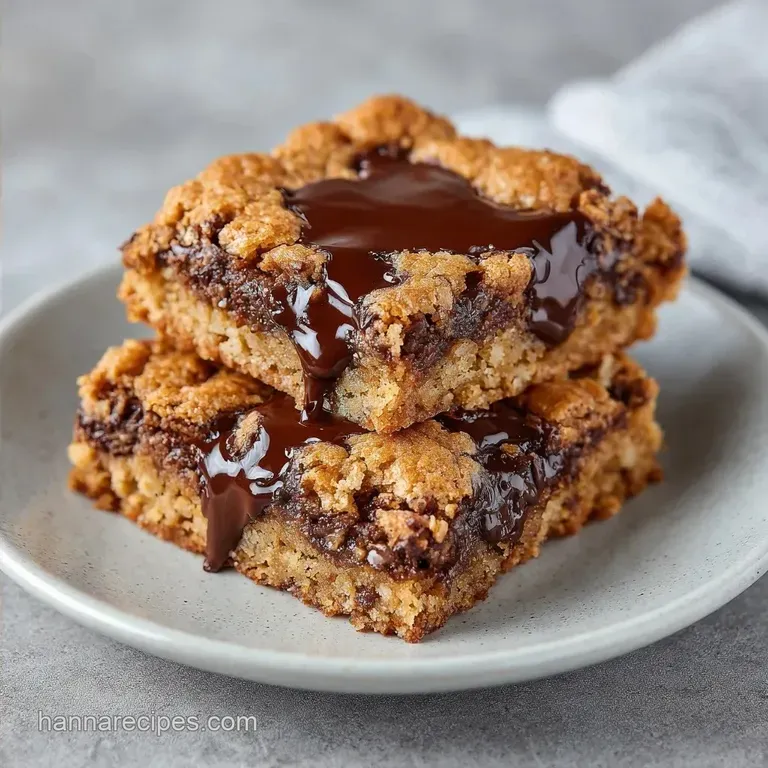
No Mixer Sheet Pan Chocolate Chip Cookies: Chewy and Rich
- Time: 10 min active + 20 min bake
- Flavor/Texture Hook: Buttery, chewy center with mahogany edges
- Perfect for: Feeding a crowd or school bake sales
The smell of melted butter and vanilla hitting a hot oven is a specific kind of magic. For a long time, the common wisdom was that you needed a heavy duty stand mixer to cream butter and sugar to get a bakery style cookie.
But let's be honest, who actually wants to wash a mixer bowl and a whisk attachment for a single batch of treats?
I used to think the "creaming method" was the only way to get that specific chew. It turns out, using melted butter actually bypasses the need for aeration. By skipping the air, we get a denser, fudgier bar that holds its shape across a whole pan.
These No Mixer Sheet Pan Cookies are designed for those moments when you want something impressive but don't have the patience for individual scooping. You just stir, spread, and bake. It's the most efficient way to get 24 squares of chocolatey goodness without losing your mind in the kitchen.
No Mixer Sheet Pan Cookies
Right then, let's get into why this works. Most people assume that without a mixer, you'll end up with a flat, greasy mess. But the physics of the sheet pan actually helps us here. Because the dough is spread thin, the heat penetrates the center quickly, while the edges caramelize.
Melted Butter: Using liquid fat instead of softened butter prevents air pockets from forming, which results in a chewy, dense crumb.
Sheet Pan Surface: The wide surface area allows for faster moisture evaporation at the edges, giving you those crisp, browned borders.
Sugar Ratios: The heavy lean toward brown sugar adds moisture and a hint of molasses, which keeps the bars from becoming dry.
| Approach | Texture | Prep Effort | Taste Profile |
|---|---|---|---|
| From Scratch | Chewy and rich | Medium | Deep butter and vanilla |
| Cake Mix Shortcut | Cake like/Soft | Low | Very sweet, artificial |
The Ingredient Breakdown
Every part of this recipe has a job. When you're baking, precision is your best friend. I always recommend weighing your flour if you have a scale, as according to King Arthur Baking, a "cup" of flour can vary by 20 grams depending on how you scoop it.
| Ingredient | What It Does | Best Swap |
|---|---|---|
| Unsalted Butter | Provides fat and chew | Coconut oil (melted) |
| Brown Sugar | Adds moisture/molasses | Coconut sugar |
| All Purpose Flour | Creates the structure | 1:1 gluten-free blend |
Tools You'll Actually Need
You don't need a fancy kitchen to pull this off. Just a few basics will do.
- A 13x18 inch rimmed baking sheet (essential for the right thickness).
- Parchment paper (don't skip this, or you'll be scrubbing the pan for an hour).
- A large mixing bowl.
- A sturdy whisk and a silicone spatula.
Steps to Bake These
Right, let's crack on. Make sure your eggs are at room temperature so they don't seize up the melted butter.
- Preheat your oven to 350°F (175°C). Line a 13x18 inch rimmed baking sheet with parchment paper, making sure the paper reaches up the sides of the pan.
- Whisk the melted butter, brown sugar, and white sugar in a large bowl. Stir until smooth and caramel colored. Note: This creates a silky base that prevents sugar granules from staying whole.
- Stir in the eggs and vanilla extract. Mix until fully incorporated and the batter looks glossy.
- Fold in the flour, baking soda, and salt using a spatula. Stir only until the white streaks of flour disappear. Note: Over mixing here develops gluten, which makes the cookies tough.
- Fold in the chocolate chips last.
- Press the dough evenly into the prepared pan. Push firmly into the corners using your spatula.
- Bake for 18–22 minutes. Pull them out when the edges are a deep mahogany colored brown but the center still looks slightly under set.
- Remove from the oven. Immediately sprinkle with flaky sea salt if you're using it.
Fixing Common Cookie Issues
Even with a simple recipe, things can go sideways. Usually, it comes down to temperature or measurement.
Greasy Cookie Base
If your cookies look oily on top, your butter was likely too hot when you added the sugars, or you over melted it. Let the butter cool for 5 minutes after melting before mixing.
Over Baking Risks
The center of the pan will continue to cook after you take it out of the oven. If you wait until the center looks "done," the cookies will be hard by the time they cool. Pull them when the middle has a slight wobble.
Too Much Flour
If the dough feels like a stiff paste rather than a soft batter, you've likely packed the flour too tightly into the measuring cup.
| Problem | Root Cause | Solution |
|---|---|---|
| Greasy Top | Butter too hot | Cool butter to 90°F before mixing |
| Cakey Texture | Too much flour | Spoon and level your flour |
| Burnt Edges | Oven temp too high | Use an oven thermometer |
Fun Flavor Tweaks
Once you've got the base down, you can play around. If you want something more traditional, you can check out my Classic Homemade Cookies for a different approach.
Using Cake Mix
For an even faster version, swap the flour, baking soda, and salt for one box of yellow or chocolate cake mix. It'll be sweeter and softer, more like a blondie.
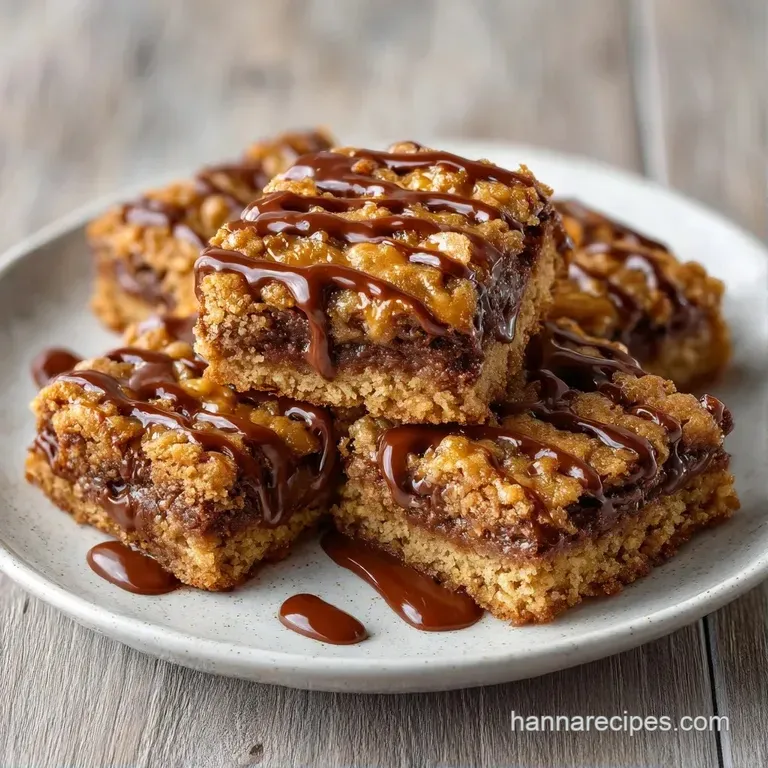
Adding a Peanut Butter Swirl
Drop 3 tablespoons of creamy peanut butter in small dollops across the top of the raw dough. Use a knife to swirl it in before baking.
Gluten-free Swaps
Replace the all purpose flour with a high-quality 1:1 gluten-free flour blend. You might need an extra 10 minutes of bake time as GF flours absorb moisture differently.
Scaling Your Batch
Adjusting the size of this recipe is easy, but you have to change the pan. If you're making a smaller batch, try these Simple Homemade Cookies for individual portions.
Scaling Down (Half Batch) Use a 9x13 inch baking pan. Reduce the bake time by about 20%, checking at the 15 minute mark. Since you can't easily halve an egg, beat one egg in a cup and use 2 tablespoons of the mixture.
Scaling Up (Double Batch) Don't try to put double the dough in one pan, or the center will never cook. Use two 13x18 inch pans. Keep the oven temp at 350°F, but rotate the pans halfway through the bake to ensure even browning.
| If you want... | Do this... | Result |
|---|---|---|
| Fudgy center | Bake 18 mins | Soft and gooey |
| Crispy edges | Bake 22 mins | Toasted and snappy |
| Saltier punch | Double sea salt | Better contrast |
Cookie Myths
There are a few things people tell you about cookies that just aren't true for this method.
"You must chill the dough." For individual cookies, chilling prevents spreading. But for No Mixer Sheet Pan Cookies, we want the dough to spread to the edges of the pan. Chilling it would just make it harder to press into the corners.
"White sugar is only for crispiness." While white sugar does help with the edges, in this recipe, it balances the heavy molasses flavor of the brown sugar. Removing it makes the cookies taste too much like gingerbread.
Saving and Storing Cookies
These stay fresh longer than individual cookies because they're denser.
Storage Keep them in an airtight container at room temperature for 3 days. In the fridge, they'll last 5 days and become even fudgier.
Freezing Freeze the squares in a single layer on a tray first, then toss them into a freezer bag. They'll stay good for 3 months. Thaw at room temperature for 20 minutes or microwave for 10 seconds.
Zero Waste If you have leftover chocolate chips, stir them into your morning oatmeal or melt them with a bit of cream for a quick chocolate sauce.
Suggested Serving Ideas
These are rich, so you want something to cut through the sweetness. A cold glass of whole milk is the classic choice, but a tart raspberry coulis or fresh sliced strawberries on the side works wonders.
For a party, cut them into small 1 inch squares rather than large bars. It makes them feel like a bite sized treat and lets you feed a bigger crowd with one pan. Just make sure they are completely cool before you slice, or you'll end up with jagged edges.
Recipe FAQs
Is it possible to make cookies without a mixer?
Yes, a whisk and spatula are all you need. Melted butter allows the dough to come together easily by hand without requiring power tools.
Can you bake cookies directly on a sheet pan?
Yes, provided you line the pan with parchment paper. This prevents the dough from sticking and ensures the edges don't burn.
Which cookies are good for diabetics?
None of these cookies are suitable due to the sugar content. If you are looking for different sugar profiles, see how we adjust ingredients in our no brown sugar recipe.
What to use if you don't have a cookie sheet?
Use a rimmed baking pan or cake pan. Be mindful that deeper pans may require a slightly longer bake time to set the center fully.
How to make the best chocolate chip cookies?
Whisk melted butter and sugars until smooth and caramel colored. This critical step creates a silky base that prevents sugar granules from remaining whole.
How to save time when baking chocolate chip cookies?
Press the dough into one large sheet pan. This eliminates the time spent scooping individual balls and allows you to bake 24 servings in one batch.
Is it true that I must use a mixer to prevent the dough from being lumpy?
No, this is a common misconception. A simple whisk is sufficient to combine the melted butter and sugars into a completely smooth batter.
No Mixer Sheet Pan Cookies

