Sheet Pan Cookie Bars: Chewy and Buttery
- Time: 10 min active + 30 min cooling
- Flavor/Texture Hook: Buttery, salty sweet with a chewy center
- Perfect for: Large parties, bake sales, or meal prep
Ever wondered why we spend an hour scooping individual dough balls when we could just bake one giant cookie? I remember trying to make cookies for a neighborhood block party a few years back. I had three trays rotating in the oven, the kitchen was 90 degrees, and I was sweating over a bowl of dough.
It felt like a conveyor belt of sugar and butter that would never end.
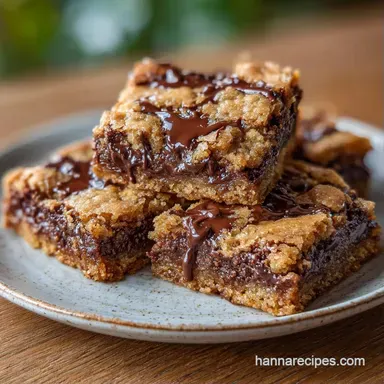
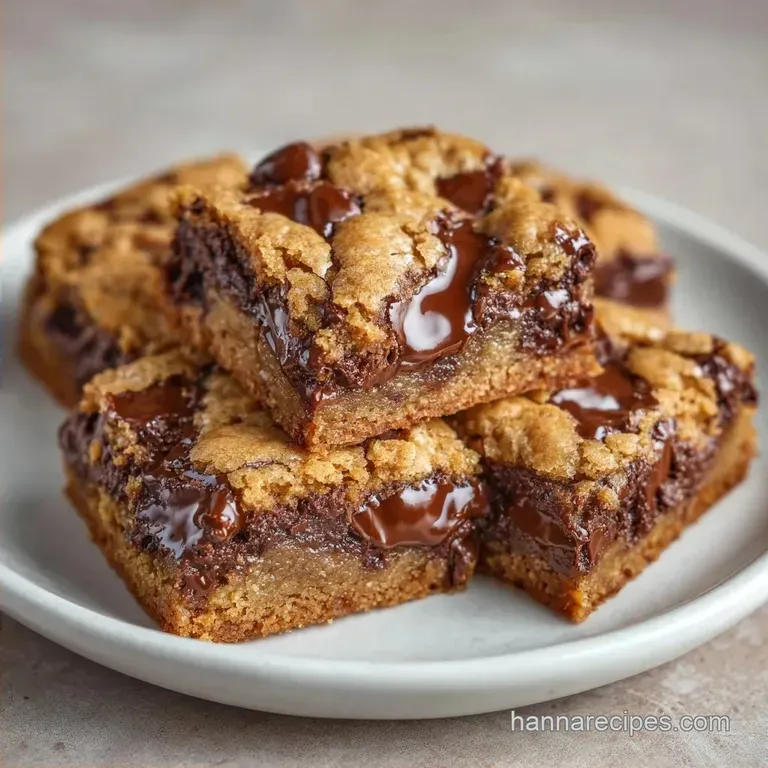
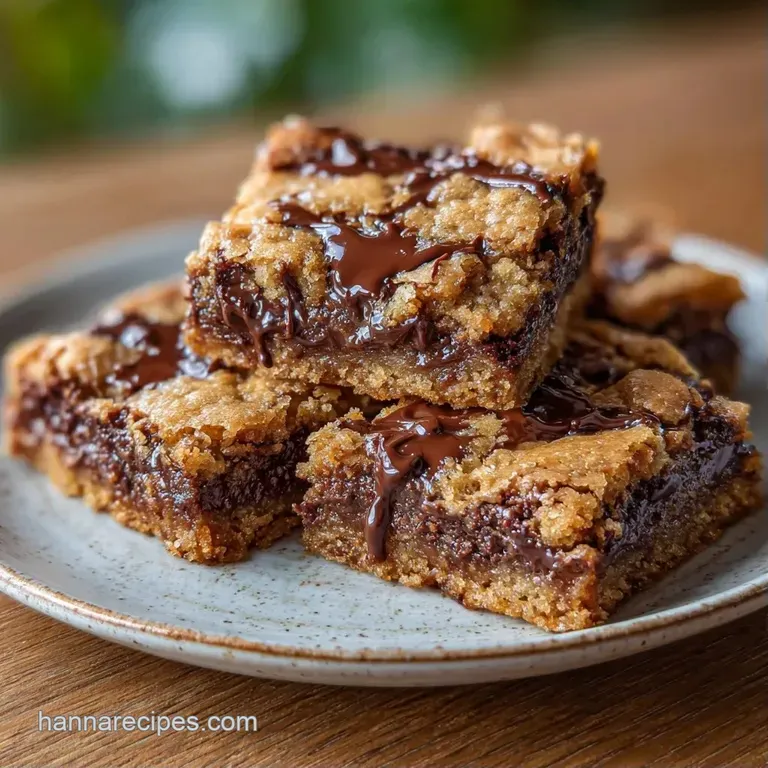
That is when I switched to the sheet pan method. Instead of fighting with oven racks, you just press everything into one pan and let the heat do the work. The result is a mix of textures, from the caramelized, crunchy edges to that soft, almost fudge like middle.
You can expect a treat that tastes like a classic bakery bar but takes a fraction of the effort. These Sheet Pan Cookie Bars are designed for people who want the taste of homemade baking without the tedious manual labor.
Why These Bars Work
The magic here is all about how the heat hits the dough. Because the dough is spread thin across a large metal surface, the edges caramelize quickly while the center stays moist. If you prefer the look of traditional round cookies, you can always go back to my traditional round cookies method, but the sheet pan is faster.
Cornstarch: This small addition inhibits gluten development, which keeps the bars tender rather than cakey. Brown Sugar Ratio: Using more brown sugar than white sugar provides the moisture and molasses notes that create a chewy pull.
| Method | Time | Texture | Best For |
|---|---|---|---|
| Sheet Pan | 20 min | Crispy edges, chewy center | Crowds |
| Individual | 45 min | Uniformly soft or crisp | Gift boxes |
Baking Precision Specs
Getting the ratios right is what separates a greasy bar from a professional one. We are aiming for a specific balance of fat and flour to ensure the bars don't spread into a thin pancake or stay like raw dough.
| Ingredient | What It Does | Best Swap |
|---|---|---|
| Unsalted Butter | Provides structure and richness | Salted butter (reduce salt by 1/4 tsp) |
| Cornstarch | Softens the crumb | Arrowroot powder |
| Baking Soda | Lifts the dough and browns the edges | 1.5 tsp baking powder |
| Brown Sugar | Adds chew and depth | Coconut sugar (denser result) |
Ingredients and Swaps
I use a mix of sugars here to get both a snap and a chew. For the mix ins, walnuts add a necessary earthy contrast to the sweet chocolate.
- 3/4 cup (170g) unsalted butter, softened Why this? Softened butter creams better with sugar.
- 3/4 cup (150g) packed light brown sugar Why this? Essential for the chewy texture.
- 1/4 cup (50g) granulated sugar Why this? Helps the edges crisp up.
- 1 large (50g) egg, room temperature Why this? Emulsifies the fats and sugars.
- 2 tsp (10ml) pure vanilla extract
- 2 1/4 cups (280g) all purpose flour
- 1 tsp (5g) cornstarch
- 1/2 tsp (3g) baking soda
- 1/2 tsp (3g) sea salt
- 1 1/2 cups (255g) semi sweet chocolate chips
- 1/2 cup (60g) chopped walnuts
- 1/2 tsp (3g) flaky sea salt
Substitution Ideas:
| Original Ingredient | Substitute | Why It Works |
|---|---|---|
| Walnuts | Pecans | Similar crunch, but slightly sweeter flavor |
| Semi sweet chips | Dark chocolate chunks | Higher cocoa content, less sweet |
| All purpose flour | White whole wheat | Adds nuttiness; Note: results in a denser bar |
Tools for the Job
You don't need a fancy kitchen for this, but a few specific tools make the process much smoother. A stand mixer such as a KitchenAid is great, but a sturdy spatula and a bowl work just fine.
- 13x18 inch rimmed baking sheet (half sheet pan)
- Parchment paper (essential for easy removal)
- Large mixing bowl
- Rubber spatula
- Sifter or fine mesh strainer
- Measuring cups and a digital scale
Baking step-by-step
Right then, let's get into it. The key here is not overmixing the dough once the flour goes in. If you stir too much, you'll develop too much gluten and the bars will be tough.
- Preheat your oven to 350°F (175°C). Line your 13x18 inch rimmed baking sheet with parchment paper, making sure it hangs over the edges so you can lift the whole block out later.
- Cream the softened butter, brown sugar, and granulated sugar in a large bowl. Use your spatula to stir until the mixture looks smooth and pale.
- Stir in the egg and vanilla extract. Keep mixing until the batter looks glossy and well combined.
- Sift the flour, cornstarch, baking soda, and salt directly into the bowl. Note: Sifting prevents clumps of baking soda in your bars.
- Gently fold the dry ingredients into the wet. Stop as soon as you see no more white streaks of flour.
- Fold in the chocolate chips and chopped walnuts using a slow, sweeping motion.
- Transfer the dough to the prepared pan. Press it evenly into all four corners using your hands or a spatula.
- Bake for 18-22 minutes until the edges are deep golden brown and the center is slightly underbaked.
- Sprinkle the flaky sea salt over the top immediately after taking them out of the oven.
- Let them cool completely in the pan for at least 30 minutes. Cutting them too early will cause them to crumble.
Chef's Note: If you want a more professional look, use a ruler to mark the bars before cutting. It ensures every piece is a perfect rectangle.
Fixing Common Issues
Even with a precise recipe, things can happen. Most issues with cookie bars come down to oven temperature or butter consistency.
Troubleshooting Common Issues
| Issue | Solution |
|---|---|
| Why are my bars too thin | This usually happens if the butter was too melted or the oven was too hot, causing the fat to liquefy before the flour could set. |
| Why is the center raw but the edges burnt | This is often a heat distribution issue. If your pan is too small or your oven has a hot spot, the edges will overcook. Using a rimmed baking sheet and parchment paper helps insulate the bottom. |
| Stop them from sticking | If you didn't use parchment paper, you might find the bars clinging to the pan. You can try running a thin knife around the edge, but for the next batch, always use parchment. |
Customizing Your Batch
I love this base recipe because it's so flexible. You can change the mix ins based on what's in your pantry. If you want a different chocolate chip bar version, you can try this Chip Sheet Pan Cookies recipe for a slightly different ratio.
Flavor Twists: - White Chocolate Cranberry: Swap semi sweet chips for white chocolate and add 1/2 cup dried cranberries. - Double Chocolate: Add 1/4 cup cocoa powder to the flour and use dark chocolate chunks.
Dietary Swaps: - Nut Free: Simply omit the walnuts or replace them with sunflower seeds. - dairy-free: Use a high-quality vegan butter stick. It works almost identically in this ratio.
Scaling the Recipe: - Half Batch: Use a 9x13 inch pan. Reduce the baking time by about 20% and use one egg, but beat it first and use only half. - Double Batch: Use two separate 13x18 inch pans. Do not double the thickness in one pan or the center will never cook.
When doubling, keep the salt and spices at 1.5x instead of 2x to avoid overpowering the flavor.
Storage and Freshness
These bars stay fresh longer than individual cookies because they are denser. I usually keep them in an airtight container at room temperature.
Storage Guidelines:
- Room Temp: Keep in a sealed container for up to 4 days.
- Fridge: Store for 7 days. They get extra chewy when cold.
- Freezer: Wrap individual bars in parchment and freeze for up to 3 months.
Zero Waste Tips: Don't toss the parchment paper if it's only lightly browned; you can often reuse it for a non stick surface in other recipes. If you have leftover walnut pieces that are too small for the bars, toast them and toss them over a salad for a bit of crunch.
Perfect Pairing Ideas
Because these are quite rich, they pair best with things that cut through the sugar. A cold glass of whole milk is the classic choice, but a bitter espresso also works well to balance the sweetness.
If you're serving these at a party, try placing them on a platter with fresh raspberries or sliced Granny Smith apples. The acidity of the fruit makes the chocolate pop. For another treat, you might enjoy my sugar cookie chocolate chip bars for a lighter, sweeter option.
Myths about Baking Bars:
- Myth: You must chill the dough for 24 hours.
- Truth: While chilling adds depth, it's not necessary for sheet pan bars. The thin profile allows them to bake quickly without spreading too much.
- Myth: Searing the bottom of the pan helps.
- Truth: High heat on the bottom often leads to burnt bases. Steady, moderate heat at 350°F is the goal.
Recipe FAQs
How to make the best sheet pan chocolate chip cookies?
Cream softened butter and sugars until pale and smooth. Fold in the flour and cornstarch gently to avoid overworking the dough, then bake at 350°F for 18 22 minutes.
How to save time when baking cookies for a crowd?
Use a single 13x18 inch rimmed baking sheet. Pressing the dough into one pan eliminates the need to scoop individual portions and reduces total oven time.
Are sheet pan cookies a good choice for a crowd?
Yes, they are the most efficient option. One batch yields 24 bars, making them significantly faster to prepare and serve than traditional cookies.
How to prepare the dough for this sheet pan cookie recipe?
Sift the flour, cornstarch, baking soda, and salt into the wet ingredients. Fold the mixture until no flour streaks remain, then stir in the chocolate chips and walnuts.
What makes these the best sheet pan cookies?
The addition of cornstarch ensures a tender, bakery style crumb. If you enjoyed this texture, see how the same principle works in our chewy chocolate chip cookies.
Can I make oatmeal sheet pan cookies using this recipe?
No, this recipe is not designed for oats. Adding oats would change the moisture balance and flour ratio, which could result in bars that are too crumbly or thin.
Is it true the center must be firm before taking the bars out of the oven?
No, this is a common misconception. The center should be slightly underbaked so the bars remain chewy after they cool completely in the pan for 30 minutes.
Sheet Pan Cookie Bars