Chocolate Chip Cookies Without Brown Sugar: Crisp and Buttery
- Time:15 minutes active + 10 minutes baking
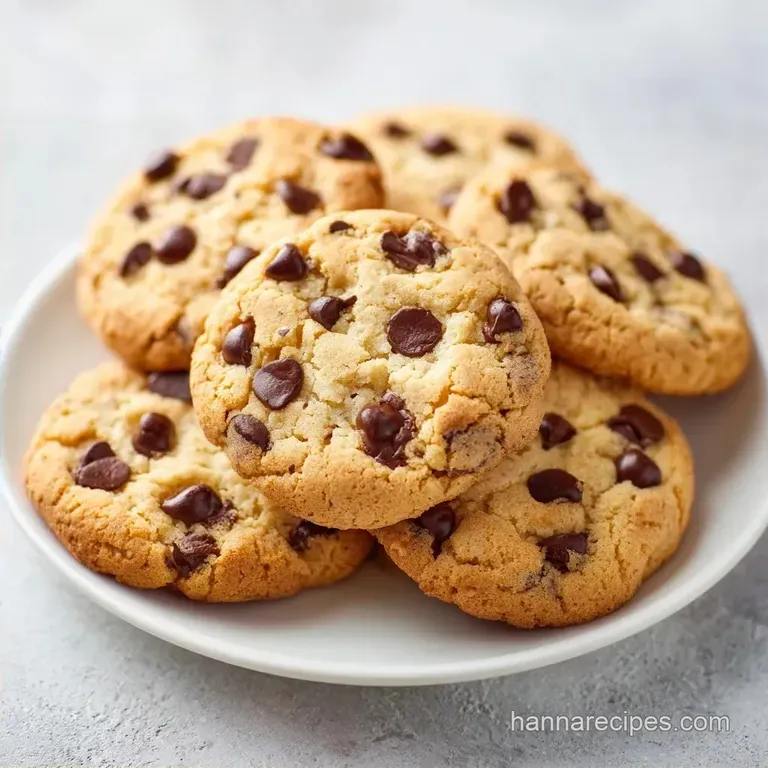
- Flavor/Texture Hook: Crisp outer ring with a soft, buttery center
- Perfect for: Quick dessert cravings or when the pantry is low on brown sugar
- No Brown Sugar Cookies
- Nailing the Texture and Bake
- The Recipe Specs
- Essential Pantry Items
- The Right Baking Tools
- Step by Step Baking Process
- Fixing Common Baking Errors
- Troubleshooting Common Issues
- Creative Flavor Twist Ideas
- Scaling the Batch
- Truths About Sugar Cookies
- Storage and Freezer Tips
- Pro Plating and Styling
- Recipe FAQs
- 📝 Recipe Card
No Brown Sugar Cookies
Back in the day, many households didn't keep a constant supply of brown sugar. It was often seen as a specialty item, whereas white granulated sugar was the reliable staple in every pantry.
This led to a style of cookie that focused on the pure, buttery flavor of the dough rather than the deep, caramel notes we usually associate with chocolate chip treats. It's a nostalgic style of baking that reminds me of old school bake sales where the cookies were pale, sweet, and shattered just right when you bit into them.
These are a bit different from your standard chewy cookie. Because we're skipping the molasses found in brown sugar, the result is a cleaner sweetness. You get a cookie that doesn't compete with the chocolate chips but instead lets the cocoa shine.
It's an honest, straightforward bake that doesn't need fancy additions to feel satisfying.
If you're looking for something that's fast and doesn't require a trip to the store for a specific sugar, this is it. You can expect a treat that spreads slightly more than a brown sugar version, giving you those lovely, lacy edges.
Trust me, once you try this version, you'll realize you don't always need the complex sugars to get a great result.
Nailing the Texture and Bake
Getting the right bite depends entirely on how you handle the fats and sugars. Since we aren't using the moisture heavy molasses of brown sugar, the structure relies on air. This is where the creaming stage comes in. If you just mix the butter and sugar until combined, you'll end up with a flat, greasy disk.
You need to beat them until the mixture actually changes color to a pale cream. This incorporates tiny air bubbles that expand in the oven, giving the cookie lift.
Another detail people miss is the temperature of the egg. If you drop a cold egg into creamed butter, the butter can seize up, breaking the emulsion. This leads to an uneven bake where some cookies spread more than others.
Let your egg sit on the counter for 30 minutes or pop it in a bowl of warm water for a few minutes. It sounds like a small thing, but it's the difference between a professional look and a home style mess.
Finally, don't overbake. These cookies don't have the dark color of brown sugar to warn you when they're done. If you wait for them to look "brown," they'll be hard as rocks by the time they cool. Pull them out when the edges are set but the centers still look a little underdone.
They'll firm up on the hot pan, which is where the magic happens.
- If you want them crispier
- Bake for an extra 60 seconds.
- If you want them softer
- Underbake slightly and cool on the pan.
- If you want them thicker
- Chill the scooped dough for 15 minutes before baking.
Fresh vs. Shortcut Comparison:
| Feature | Freshly Creamed Butter | Melted Butter Shortcut | Impact |
|---|---|---|---|
| Texture | Airy and light | Dense and fudgy | Melted butter removes air pockets |
| Spread | Controlled | High spread | Melted butter leads to thinner cookies |
| Flavor | Classic buttery | Toffee like | Melted butter browns faster |
The Recipe Specs
To keep things foolproof, you need to follow the ratios exactly. Baking is a bit like a lab experiment. If you add too much flour, the cookies won't spread and will feel cakey. Too little, and they'll merge into one giant sheet on your baking tray.
The balance here is designed to maximize the "snap" of the white sugar. We use a higher ratio of sugar to flour than you might see in a shortbread, which ensures that the edges caramelize quickly at 350°F.
The baking soda provides the lift, while the salt cuts through the sweetness so it doesn't feel cloying.
- Butter Temp
- Should be 65°F (18°C) - indentable with a finger but not greasy.
- Bake Time
- Exactly 10 minutes for a medium soft center.
- Spacing
- 2 inches apart to prevent "cookie merging."
Essential Pantry Items
I only use the basics here. No fancy syrups or additives. The goal is a clean profile that lets the butter and chocolate do the heavy lifting.
- 1/2 cup (115g) unsalted butter, softened Why this? Provides the primary structure and flavor.
- 1 cup (200g) granulated white sugar Why this? Creates the crisp edges and light color.
- 1 large egg, room temperature Why this? Binds the dough and adds moisture.
- 1 tsp (5ml) vanilla extract Why this? Adds aromatic depth to the white sugar.
- 2 cups (250g) all purpose flour Why this? Standard protein for a reliable crumb.
- 1/2 tsp (3g) baking soda Why this? Reacts with heat to create lift.
- 1/2 tsp (3g) salt Why this? Balances the sugar levels.
- 1 1/2 cups (255g) semi sweet chocolate chips Why this? Classic contrast to the sweet dough.
Ingredient Swaps:
| Original Ingredient | Substitute | Why It Works |
|---|---|---|
| All purpose Flour | White Whole Wheat Flour | Adds nuttiness. Note: Cookies will be denser and slightly heartier |
| Semi sweet Chips | Dark Chocolate Chunks | Deeper flavor. Note: Less sweet, more intense cocoa |
| Unsalted Butter | Salted Butter | Works fine. Note: Reduce added salt to 1/4 tsp |
The Right Baking Tools
You don't need a professional kitchen to get these right, but a few specific tools make life easier. A hand mixer or a stand mixer (like a KitchenAid) is strongly recommended. Doing the creaming by hand is a workout and rarely gets the butter fluffy enough.
A parchment lined baking sheet is non negotiable. Grease alone can be uneven, and these cookies spread enough that they might stick to the pan if you aren't careful. Also, use a tablespoon or a small cookie scoop. This ensures every cookie is the same size, meaning they all finish baking at the exact same time.
Step by step Baking Process
Phase 1: Creaming and Emulsifying
Beat the softened butter and granulated sugar together on medium high speed for 2–3 minutes. Stop when the mixture looks pale and fluffy. Add the egg and vanilla extract, beating until the batter is smooth and fully incorporated. This is where you build the air structure.
Phase 2: Folding the Dry Ingredients
Lower the mixer speed to low. Gradually add the flour, baking soda, and salt. Mix only until the white streaks of flour disappear. If you overmix here, you develop too much gluten, and the cookies will be tough. Fold in the chocolate chips by hand using a spatula.
Phase 3: The Bake
Scoop rounded tablespoons of dough onto a lined baking sheet, spacing them 2 inches apart. Bake at 350°F (175°C) for 9–11 minutes. Remove when edges are set and lightly golden, but the centers still look slightly soft.
Ingredient Deep Dive:
| Ingredient | Science Role | Pro Secret |
|---|---|---|
| White Sugar | Crystallization | Higher temp needed for browning than brown sugar |
| Baking Soda | Leavening | Needs heat to release CO2 for that slight lift |
| Butter | Fat/Tenderizer | Cold butter = thicker; Soft butter = spreads more |
Fixing Common Baking Errors

When things go wrong with No Brown Sugar Cookies, it's usually a temperature issue. Since white sugar doesn't hold onto moisture as well as brown sugar, the dough is more sensitive to heat. If your kitchen is too hot, the butter will melt before the cookies hit the oven, leading to a thin, oily puddle.
Troubleshooting Common Issues
| Issue | Solution |
|---|---|
| Why Your Cookies Spread Too Much | This usually happens because the butter was too soft or the oven wasn't fully preheated. When butter is too warm, it doesn't hold the air bubbles from the creaming process. |
| Why Your Cookies Are Too Pale | Since we aren't using molasses, these cookies naturally stay lighter. However, if they're completely white after 11 minutes, your oven might be running cool. |
| Why Your Cookies Feel Cakey | Overmixing the flour is the culprit here. When you beat the flour too long, you create a network of gluten. |
Common Mistakes Checklist:
- ✓ Did you cream the butter and sugar for at least 2 minutes?
- ✓ Is the egg at room temperature?
- ✓ Did you stop mixing as soon as the flour disappeared?
- ✓ Are the cookies spaced 2 inches apart?
- ✓ Did you pull them out while the centers still looked soft?
Creative Flavor Twist Ideas
Once you have the base down, you can change the profile without changing the method. Because the white sugar is so neutral, it takes on other flavors very well. If you want something a bit more complex, try adding a pinch of cinnamon or a dash of nutmeg to the dry ingredients.
For a nuttier version, swap half of the chocolate chips for toasted walnuts or pecans. This adds a crunch that complements the crisp edges of the cookie. If you're feeling fancy, a sprinkle of flaky sea salt on top right after they come out of the oven makes these feel like something from a boutique bakery.
If you enjoy different textures, you might want to check out my chewy cookies for a comparison in how sugar affects the bite. For those who need something even faster, these quick cookies are another great option for a busy weeknight.
For a Nutty Crunch
Add 1/2 cup of finely chopped almonds. The oils in the nuts help keep the center moist while the white sugar keeps the edges crisp.
For a Darker Profile
Use 70% dark chocolate instead of semi sweet. The bitterness of the dark chocolate balances the purity of the white sugar beautifully.
Scaling the Batch
If you need to make a smaller or larger amount, remember that baking isn't always linear. When scaling down to a half batch, the egg is the tricky part. Crack one egg into a bowl, beat it, and then use exactly half of it by weight or volume.
When doubling the recipe, don't double the baking soda and salt exactly. Use about 1.5x the amount instead. Too much leavening can leave a metallic aftertaste in a large batch. Also, work in batches with your baking sheets.
If you crowd the oven with too many trays, the airflow is blocked, and the cookies won't brown evenly.
- Half Batch
- Use 1/2 an egg; reduce bake time by 1-2 minutes.
- Double Batch
- Use 1.5x salt/soda; bake in separate rotations to ensure heat flow.
- Triple Batch
- Use a stand mixer; increase creaming time by 1 minute.
Truths About Sugar Cookies
There are a few things people get wrong about baking without brown sugar. One big one is the idea that you must have brown sugar for a chocolate chip cookie. While it adds a specific chew, white sugar provides a cleaner, crisper result that many people actually prefer. According to King Arthur Baking, the type of sugar used directly impacts the pH of the dough, which changes how the baking soda reacts.
Another myth is that chilling the dough is always necessary. For these specific No Brown Sugar Cookies, chilling is great if your kitchen is hot, but if your butter is the right temperature, you can bake them immediately. You don't need to wait hours to get a great result.
Finally, some say you can't use salted butter. You absolutely can, just omit the extra salt. The key is the total salt content, not the source.
Storage and Freezer Tips
To keep these cookies from getting stale, store them in an airtight container at room temperature. I like to put a small piece of white bread in the container with them. The cookies absorb the moisture from the bread, which keeps them from becoming too hard over time. They'll stay fresh for about 5 days.
If you want to freeze them, you have two choices. You can freeze the baked cookies, or you can freeze the raw dough balls. I prefer the raw dough method. Scoop the dough into balls and freeze them on a tray for an hour before transferring them to a freezer bag.
When you want a treat, just pop a few on a tray and add 2 minutes to the bake time.
- Room Temp
- 5 days in airtight container.
- Fridge
- 7 days (though they get harder).
- Freezer (Raw)
- 3 months.
- Freezer (Baked)
- 2 months.
Zero Waste Tip: If you have leftover butter or egg, use the butter for a quick sauté and the egg for your morning scramble. If you have a few broken cookies, crumble them over vanilla ice cream for a quick dessert topper.
Pro Plating and Styling
To make these look like they came from a shop, use a round glass of water to "scoot" the cookies immediately after they come out of the oven. Gently press the glass over the hot cookie and move it in a circular motion. This rounds out the edges and creates a perfectly symmetrical circle.
For a gourmet touch, press a few extra chocolate chips into the top of the dough balls right before they go into the oven. This ensures the chips are visible on top rather than hidden inside the dough.
Serve these on a wooden platter with a glass of cold milk or a strong coffee. The bitterness of the coffee cuts through the white sugar sweetness, making for a balanced snack. If you're serving them at a party, stack them in a pyramid shape to show off those crisp, golden edges.
Recipe FAQs
What do I use instead of brown sugar in cookies?
Use granulated white sugar. This provides a clean sweetness and contributes to a crispier final texture compared to the chewiness of brown sugar.
How do sugar substitutions affect the cookie’s texture?
They create a lighter color and a crispier edge. Without the molasses found in brown sugar, the cookies lose some density. If you enjoyed the crispness here, the same logic applies to our white sugar cookies.
Is it true that chocolate chip cookies require brown sugar to be chewy?
No, this is a common misconception. While brown sugar adds a specific type of chew, you can still achieve a great texture by properly creaming the butter and sugar for 2 3 minutes.
Are no-brown sugar cookies healthier than traditional ones?
False. These cookies still contain a full cup of granulated white sugar, meaning the caloric content and impact on blood sugar remain largely the same.
How do I prevent my no-brown sugar cookies from becoming too dry?
Remove them from the oven while the centers still look slightly soft. Bake at 350°F for only 9 11 minutes; overbaking is the primary cause of dryness in white sugar-based doughs.
Can I make these cookies diabetic friendly?
No, this recipe is not suitable for diabetics. It relies on a significant amount of granulated white sugar to achieve its structure and flavor.
How long will these cookies stay fresh?
Store them for up to 5 days. Keep them in an airtight container at room temperature, preferably with a piece of white bread to help the cookies retain moisture.
No Brown Sugar Cookies

