Brown Butter Sheet Pan Dessert: Chewy and Crisp
- Time: 15 min active + 25 min baking
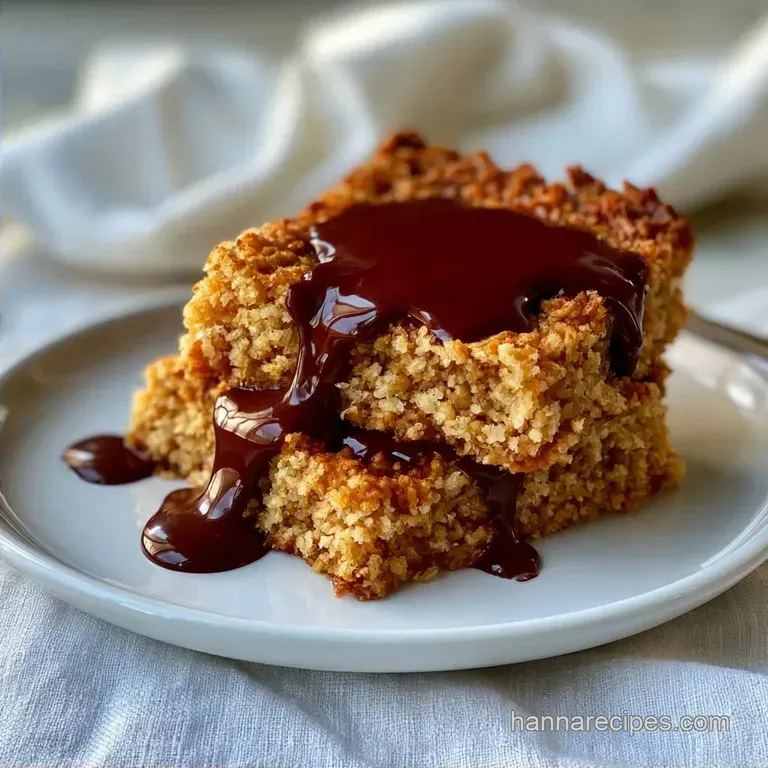
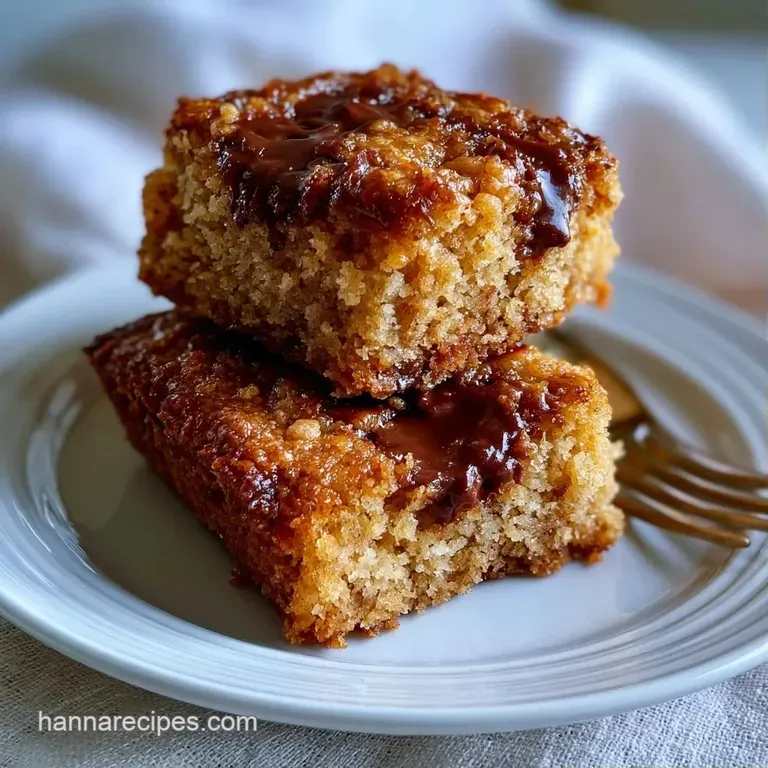
- Flavor/Texture Hook: Nutty browned butter with a chewy center and crisp edges
- Perfect for: Feeding a crowd or easy meal prep
Why You'll Love This Baked Sheet Pan Dessert
The smell of butter browning in a pan is the only alarm clock I need. I remember the first time I tried to make individual cookies for a neighborhood block party, and I spent three hours just scooping dough. I was exhausted before the oven even preheated, and the kitchen looked like a flour bomb had gone off.
That's when I switched to the slab method. I realized that if I just pressed everything into one pan, I got the same flavor but saved nearly two hours of standing over a counter. It's a huge win for anyone who wants a high-quality treat without the tedious labor.
You can expect a treat that tastes like a professional bakery item but requires almost no effort. This recipe gives you a dense, rich base loaded with chocolate and walnuts, all finished with a hit of sea salt to balance the sweetness.
Quick Recipe Specs
Right then, let's look at the numbers so you can plan your timing. Precision is what makes baking work, and these markers ensure you don't end up with a cakey mess.
Precision Checkpoints:
- Oven Temp: 175°C (350°F)
- Butter Weight: 225g
- Bake Time: 25 minutes
Decision Shortcut:
- Want more crunch? Add an extra handful of walnuts.
- Want a fudgier center? Pull the pan at 23 minutes.
- Want more salt? Add a second pinch of flaky sea salt.
| Method | Prep Time | Texture | Best For |
|---|---|---|---|
| Fresh Scoops | High | Uniform | Small batches |
| Sheet Pan | Low | Mixed Edges | Big crowds |
Everything You'll Need
The combination of sugars here is what creates that specific chew. We're using a mix of brown and white sugar to get both moisture and a slight snap on the edges.
Ingredient Science
| Ingredient | What It Does | Best Swap |
|---|---|---|
| Brown Butter | Adds nutty depth | Unsalted butter (less flavor) |
| Brown Sugar | Creates chew | More white sugar (crispier) |
| Baking Soda | Provides lift | Baking powder (lighter texture) |
The Ingredients
- 225g unsalted butter Why this? Browning it adds a toasted, nutty flavor.
- 150g brown sugar, packed (Substitute: Coconut sugar)
- 100g granulated white sugar (Substitute: Caster sugar)
- 1 large egg (50g) (Substitute: Flax egg for vegan)
- 5ml vanilla extract (Substitute: Almond extract)
- 280g all purpose flour (Substitute: 1:1 gluten-free blend)
- 5g baking soda (Substitute: 1.5 tsp baking powder)
- 3g sea salt (Substitute: Kosher salt)
- 340g semi sweet chocolate chips (Substitute: Dark chocolate chunks)
- 150g chopped walnuts (Substitute: Pecans)
- 3g flaky sea salt (Substitute: Coarse salt)
Necessary Kitchen Gear
You don't need a fancy setup for this, but a few specific tools make the process smoother. A heavy bottomed saucepan is a must for the butter, otherwise, it can burn too quickly.
I recommend a standard 18 x 13 inch rimmed baking sheet. Make sure it has a rim, or you'll have melted butter leaking into your oven. Using a large mixing bowl and a sturdy spatula will make folding in the chocolate chips much easier.
How to Bake It
Let's crack on with the actual process. Pay close attention to the butter, as it moves from "perfect" to "burnt" in about thirty seconds.
Phase 1: Prepping the Pan and Butter
- Preheat your oven to 175°C (350°F). Line your 18 x 13 inch rimmed baking sheet with parchment paper, leaving a bit of overhang for easy lifting.
- Place 225g butter in a saucepan over medium heat. Melt and whisk constantly until the butter foams and small brown specks appear at the bottom with a nutty aroma. Remove from heat immediately.
Phase 2: Building the Batter
- Stir the browned butter with 150g brown sugar and 100g white sugar in a large bowl until the mixture is smooth.
- Whisk in one egg and 5ml vanilla extract until the batter looks glossy and combined.
- Fold in 280g flour, 5g baking soda, and 3g sea salt using a spatula. Mix just until no streaks of flour remain. Note: Overmixing makes the bars tough.
Phase 3: Baking to Perfection
- Fold in 340g chocolate chips and 150g chopped walnuts.
- Transfer the batter to the baking sheet and spread it evenly. Sprinkle with 3g flaky sea salt.
- Bake for 25 minutes until the edges are golden brown and the top is set.
Tips and Pitfalls
One mistake I made early on was ignoring the parchment overhang. If you don't leave an inch or two of paper hanging off the sides, you'll be struggling to lift the slab out, which often leads to the bars breaking.
Another thing to watch is the butter. If it turns dark brown or black, throw it out and start over. Burnt butter tastes bitter and will ruin the entire batch. Keep the heat medium and keep whisking.
Troubleshooting Common Issues
| Issue | Solution |
|---|---|
| Why Your Dessert Burnt | If the bottom is charred but the top is pale, your pan might be too thin. Using a heavier gauge sheet pan helps distribute heat more evenly. |
| Why The Center Stayed Raw | This usually happens if the batter is piled too high in the middle. Use your spatula to press the dough firmly into the corners and flatten the center before baking. |
| Why Butter Smells Burnt | The milk solids in butter burn quickly once the water evaporates. Remove the pan from the heat the second you see those brown specks. |
Taste Variations
You can easily tweak this base to fit your mood. If you're in the mood for something a bit more traditional, my chewy cookie recipe uses a similar base but focuses on a different shape.
For a "Double Chocolate" Twist Replace 30g of the flour with high-quality cocoa powder. This turns the slab into a rich, brownie like experience.
For a White Chocolate Raspberry Version Swap the semi sweet chips for white chocolate and fold in 100g of freeze dried raspberries. The tartness of the berries cuts through the richness of the butter.
For a gluten-free Alternative Use a 1:1 gluten-free baking flour blend. According to King Arthur Baking, adding a pinch of xanthan gum if your blend doesn't have it will prevent the slab from crumbling.
Storage and Freshness
These bars stay fresh at room temperature for about 3 days if you keep them in an airtight container. I usually store mine in a plastic bin with a piece of parchment paper between layers to prevent sticking.
For longer storage, you can freeze them for up to 3 months. Just slice them into bars first, wrap them individually in foil, and toss them in a freezer bag. When you want one, just pop it in the microwave for 15 seconds.
If you have leftover walnuts or almond slivers, don't toss them. Toast them in a dry pan for 2 minutes and keep them in the fridge for your next batch of 15 minute desserts.
Serving Suggestions
The best way to eat these is slightly warm. I love serving a square with a scoop of cold vanilla bean ice cream on top. The contrast between the hot, salty chocolate and the cold cream is a win every time.
For a more adult version, pair a bar with a glass of cold milk or a strong espresso. The bitterness of the coffee complements the toasted notes of the brown butter.
Common Baking Myths
Myth: You must sift flour for sheet pan desserts. Truth: A good whisking of the dry ingredients is enough to remove lumps. Sifting is overkill for this kind of batter.
Myth: Browning butter is only for professional chefs. Truth: Anyone can do it. You just need to watch for the foam and the smell. It's a simple process that adds massive flavor.
Recipe FAQs
How to make the best chocolate chip sheet pan bars?
Brown the butter over medium heat until it smells nutty and develops small brown specks. If you enjoyed mastering the browned butter technique here, see how the same principle works in soft chocolate cookies.
How to save time when preparing these dessert bars?
Line your baking sheet with parchment paper immediately after preheating the oven to 350°F. This streamlines the process and eliminates the need to scrub the pan later.
Can these baked sheet pan desserts be made no-bake?
No, this recipe requires baking. The flour and baking soda must be heated to set the structure and create the correct texture.
Are these sheet pan desserts a healthy option?
No, these are an indulgent treat. The combination of butter, brown sugar, and chocolate chips makes them a dessert rather than a health food.
Is it true that any baking pan works for this recipe?
No, this is a common misconception. You must use an 18 x 13 inch rimmed baking sheet to ensure the batter spreads correctly and bakes through in 25 minutes.
How to prevent the bars from breaking when removing them?
Leave an overhang of parchment paper on the sides of the pan. This allows you to lift the entire slab out safely without the bars cracking.
How to store these bars for maximum freshness?
Place them in an airtight container at room temperature for up to 3 days. For longer storage, wrap individual bars in foil and freeze for up to 3 months.
Baked Sheet Pan Dessert

