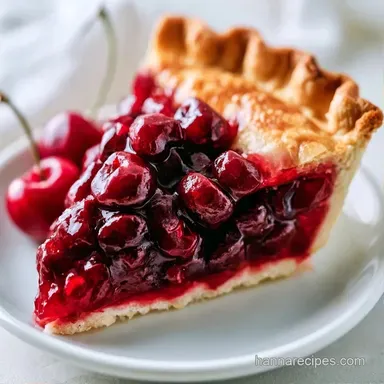
Baked Cherry Pie with Thick Filling and Buttery Crust

- Time: 30 min active + 1 h cooking + 2 h 15 min resting
- Flavor & Texture: Tart, jammy center with a shattering, buttery crust
- Perfect for: Summer family reunions or holiday potlucks
The sound of a fork cracking through a golden, sandy crust is the best part of a summer dinner. When you pull this out of the oven, the filling should be bubbling through the lattice in thick, slow globs, not running like water.
This is a treat for those moments when you want something that looks like it took all day but relies on a few smart techniques. You get a deep, concentrated cherry flavor that doesn't get lost in a watery mess.
A baked cherry pie with thick filling needs a balance of tartness and sugar, which is why sour cherries are the move here. The two-stage bake ensures the bottom is cooked through while the top gets that rich brown color.
What Makes This So Good
- Stovetop Thickening: Cooking the cherries and cornstarch in a pan first ensures the filling is set. It removes the guesswork of whether the oven heat will be enough to thicken the juices.
- The Temperature Drop: Starting at 425°F (220°C) blasts the butter in the crust to create steam, which makes it flaky. Dropping to 375°F (190°C) allows the center to heat through without burning the edges.
- The Pre-Bake Chill: Putting the assembled pie in the fridge for 30 minutes firms up the butter again. This stops the dough from shrinking down the sides of the pan.
The Building Blocks
| Component | Purpose | Substitute Notes |
|---|---|---|
| All-purpose flour | Provides the structure | White whole wheat: Heavier texture, use 10% less |
| Unsalted butter | Creates flaky layers | Vegan butter: Works well, but check melting point |
| Cornstarch | Thickens the fruit juices | Arrowroot: Use slightly less, results in a glossier look |
| Sour cherries | Balanced tart flavor | Sweet cherries: Reduce sugar by 1/4 cup |
Recipe Specs
To achieve the best results, you'll need a few basic tools. A 9-inch deep-dish pie plate is recommended. If you use a shallower pan, you will have leftover filling, so avoid overfilling it to prevent it from boiling over.
When making the dough, a pastry cutter is ideal for keeping the butter chilled. If you don't have one, two knives or a sturdy fork will work, though you'll need to work faster to keep the butter from melting into the flour.
Equipment Needed
- 9-inch deep-dish pie plate
- Large mixing bowl
- Pastry cutter or forks
- Medium saucepan
- Rolling pin
- Plastic wrap
The Cooking Process
Phase 1: Crafting the Crust
- In a large bowl, whisk together 2½ cups all-purpose flour, 1 tsp granulated sugar, and 1 tsp salt.
- Add 1 cup chilled and cubed unsalted butter. Use a pastry cutter to blend until the mixture resembles coarse crumbs with some pea-sized lumps remaining. Note: Those lumps of butter are what create the flakes.

- Add 6-8 tbsp ice water one tablespoon at a time, stirring with a fork until the dough just holds together.
- Divide the dough into two discs (one slightly larger for the bottom), wrap in plastic, and refrigerate for 60 minutes.
- On a floured surface, roll the bottom crust to roughly 1/8 inch (3mm) thickness. Fit it into a 9-inch deep-dish pie plate, leaving a slight overhang.
Phase 2: Simmering the Filling
- In a saucepan, stir together 6 cups pitted sour cherries, ¾ cup granulated sugar, ¼ cup cornstarch, 1 tbsp lemon juice, ½ tsp ground cinnamon, and ¼ tsp salt.
- Place the mixture over medium heat and stir constantly. Cook for 5-10 minutes until the liquid transforms into a clear, thick glaze that coats the cherries heavily.

- Remove the filling from heat and let cool slightly. Note: Adding hot filling to cold dough will melt the butter and ruin the flakiness.
- Pour the thickened cherry mixture into the chilled bottom crust.
Phase 3: Assembly & Lattice
- Roll the second dough disc to 1/4 inch (6mm) thickness. Cut into strips and weave a lattice pattern over the top, then trim and crimp the edges.

- Place the assembled pie in the refrigerator for 30 minutes.
- Preheat the oven to 425°F (220°C).
- Brush the lattice with an egg wash made from 1 large egg beaten with 1 tbsp water, then sprinkle with 1 tbsp coarse sanding sugar.
Phase 4: The Two-Stage Bake
- Bake at 425°F (220°C) for 15 minutes.
- Reduce the oven temperature to 375°F (190°C) and bake for another 40-45 minutes. If the edges brown too quickly, cover them with strips of aluminum foil.
- Remove the pie from the oven when the crust is a deep golden brown and the filling is bubbling through the lattice.
What Can Go Wrong

Fixing a Runny Center
If the pie is still liquid when you cut it, the cornstarch didn't reach the necessary temperature to bond. This usually happens if the filling wasn't simmered long enough on the stove or the pie didn't stay in the oven until it bubbled.
Preventing Crust Shrinkage
When the sides of the crust slide down the walls of the pan, it's because the gluten was stretched or the butter was too warm. Let the dough drape naturally into the pan and never skip the 30-minute chill after assembly.
Managing Burnt Edges
Because the crust is exposed and the filling takes longer to heat, the edges often brown before the center is done. Aluminum foil shields are the only way to stop this once the bake has started.
| Problem | Root Cause | Solution |
|---|---|---|
| Runny Filling | Cornstarch not activated | Simmer on stove until glaze is clear and thick |
| Shrinking Crust | Dough too warm or stretched | Chill assembled pie 30 mins before baking |
| Burnt Edges | High heat exposure | Cover edges with aluminum foil strips |
Storage & Reheating
Store the pie under a cover in a cool spot for up to 2 days. To extend its shelf life, seal it tightly and refrigerate for a maximum of 4 days.
This recipe is freezer-friendly if you store it before baking. Wrap the unbaked pie securely in foil and freeze for up to 3 months. When you are ready to eat, bake it directly from the freezer, adding 10-15 minutes to the total cooking time.
To restore that fresh-from-the-oven crunch, heat individual slices in a 350°F (175°C) oven for 10 minutes, until the centre reaches 165°F (74°C). This crisps the buttery crust without overcooking the fruit.
Perfect Complements
Vanilla bean ice cream is a timeless pairing, as its chilled sweetness balances the tartness of the cherries. For a lighter alternative, try a dollop of unsweetened whipped cream or a swirl of creme fraiche.
To drink, a chilled glass of sparkling water with a lime wedge refreshes the palate between bites of the rich, buttery crust.
Flavor Variations to Try
Almond Infusion
Add 1/2 tsp of almond extract to the filling during the simmering stage. Almond and cherry are a natural match, and it gives the pie a more complex, nutty profile.
Mixed Berry Blend
Swap 2 cups of the cherries for blueberries or raspberries. If you use raspberries, you might need an extra tablespoon of cornstarch because they release more water. For something different, you could try Cherry Pie Crumb Bars if you prefer a handheld treat.
Gluten-free Option
Use a 1:1 gluten-free flour blend. Note that the crust will be more fragile, so roll it between two sheets of parchment paper to avoid it tearing. You'll likely need 1-2 extra tablespoons of ice water as GF flours absorb liquid differently.
Before You Start Cooking
How do I make homemade cherry filling?
Stir sour cherries, sugar, cornstarch, lemon juice, cinnamon, and salt in a saucepan over medium heat.
Tip: Cook for 5-10 minutes until the liquid transforms into a clear, thick glaze.
How to bake a cherry pie from frozen?
Bake the pie straight from the freezer and add 10-15 minutes to the total cook time.
Tip: Wrap the unbaked pie tightly in foil before freezing for up to 3 months.
What is the best way to store cherry pie?
Store the pie covered in a cool spot for 2 days or keep it refrigerated in a sealed container for 4 days.
Tip: To crisp the crust, warm individual slices in a 350°F (175°C) oven for 10 minutes, until the centre reaches 165°F (74°C).
What are the best pie cherries?
Sour cherries are the best choice to ensure a balanced sweet-tart flavor.
Tip: If you love the tart balance here, see how we use similar fruit in our cherry cobbler.
Can frozen cherries be used, and should they be thawed and drained first?
Yes, frozen cherries can be used in this recipe.
Tip: Drain them well and pat dry to prevent the filling from becoming too thin.
Can canned or bottled cherries replace fresh, and how much liquid should be kept?
Yes, canned or bottled cherries are suitable replacements for fresh ones.
Tip: Use less of the bottled liquid to ensure the cornstarch can still thicken the glaze.
Why is the filling runny when the pie is cut, and how long must it cool?
The filling is still too hot to set properly when the pie is sliced too early.
Tip: Allow the pie to cool completely to room temperature before cutting.
Baked Cherry Pie with Thick Filling