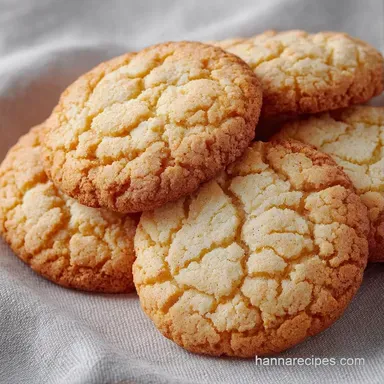
Vanilla Extract Cookie Recipe: Soft and Pillowy
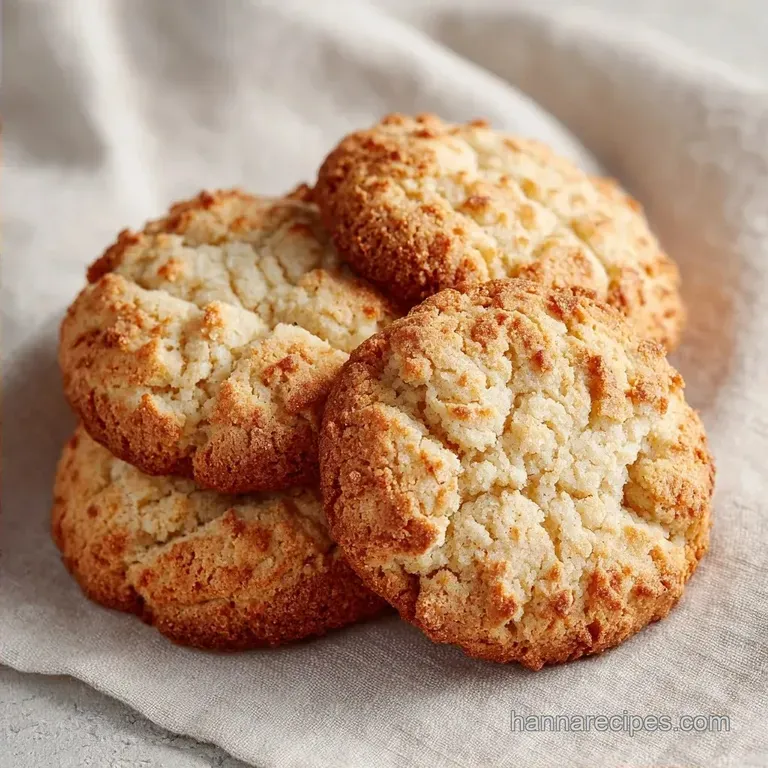
- Time:15 minutes active + 10 minutes cook
- Flavor/Texture Hook: Velvety vanilla scent with a soft, pillowy bite
- Perfect for: Quick dessert cravings or school lunchbox treats
The smell of pure vanilla hitting a hot oven is something else. It fills the whole house in a way that makes everything feel cozy, regardless of the weather outside. I remember the first time I tried using imitation vanilla in a batch of cookies; they tasted "sweet" but lacked that deep, woody warmth that makes a cookie feel like a real treat.
The hero here is the pure vanilla extract. It isn't just a background flavor, it's the soul of the dish. By using a full tablespoon, we move past that generic sweetness and get into the floral, creamy notes that define a high end bakery cookie.
You can expect a cookie that is soft in the middle with edges that just barely start to crisp. This Vanilla Extract Cookie Recipe focuses on foolproof results, so you don't have to guess if they are done.
We'll focus on the visual cues like the pale color of the creamed butter to make sure these come out right every time.
The Best Vanilla Extract Cookie Recipe
Getting the texture right comes down to a few small things that most people ignore. I used to just throw everything in a bowl and hope for the best, but that usually led to flat, greasy puddles on my baking sheet. The magic happens when you respect the temperature of your ingredients and the timing of your mix.
If you're looking for something even faster, you might like my simple homemade cookies, but these vanilla forward treats are for when you want a more sophisticated, velvety flavor. It's about the balance between the salt, the fat, and that hit of vanilla.
The goal is a cookie that holds its shape but still melts in your mouth. We achieve this by not overworking the flour. Once the dry ingredients hit the wet, we stop mixing almost immediately. This prevents the gluten from getting too tough, which is the difference between a "bread like" cookie and a tender one.
The Secret to Success
Baking is just science you can eat. When we cream butter and sugar, we aren't just mixing them, we are forcing air into the fat. This creates thousands of tiny bubbles that the baking soda then expands during the bake.
- Air Incorporation
- Beating butter and sugar for 3 full minutes creates a stable foam that helps the cookies rise.
- Fat Suspension
- Room temperature eggs prevent the butter from curdling, which keeps the texture silky.
- Leavening Control
- Baking soda reacts with the slight acidity in the butter to create a lift that keeps the center soft.
- Sugar Dissolution
- Granulated sugar melts into the butter, creating those tiny crisp edges while leaving the center tender.
According to King Arthur Baking, the temperature of your butter is the most important factor for a consistent rise. If the butter is too soft, the air bubbles collapse, and your cookies will spread.
| Method | Time | Texture | Best For |
|---|---|---|---|
| Oven Baked | 25 mins | Soft center, crisp edge | Classic batch baking |
| Stovetop (Pan) | 15 mins | Denser, fudge like | Single servings |
Component Analysis
Understanding why we use these specific amounts helps you avoid mistakes. For example, using too much flour will make the cookie dry, but too little will make it a pancake.
| Ingredient | Science Role | Pro Secret |
|---|---|---|
| Unsalted Butter | Provides structure and richness | Use butter that you can dent with a finger, not melted butter |
| Granulated Sugar | Creates sweetness and browning | Don't swap for brown sugar if you want a clean vanilla taste |
| Vanilla Extract | Primary aromatic flavor | Add it after the eggs to prevent the alcohol from evaporating too early |
| Baking Soda | Chemical leavener | Sift it with the flour to avoid "salty" clumps in the dough |
What You'll Need
For this Vanilla Extract Cookie Recipe, keep your ingredients simple. Quality matters here, especially with the butter and the vanilla.
- 1 cup (225g) unsalted butter, softened Why this? Provides the necessary fat for a tender crumb
- 1 cup (200g) granulated sugar Why this? Essential for the crisp edges and sweetness
- 2 large eggs, room temperature Why this? Binds the dough and adds moisture
- 1 tablespoon (15ml) pure vanilla extract Why this? The core flavor profile of the cookie
- 2 3/4 cups (340g) all purpose flour Why this? Standard protein content for a balanced chew
- 1 teaspoon (5g) baking soda Why this? Creates the lift and a slight browning
- 1/2 teaspoon (3g) salt Why this? Balances the sugar and enhances vanilla
Substitution Options
| Original Ingredient | Substitute | Why It Works |
|---|---|---|
| Unsalted Butter | Vegan Butter Stick | Similar fat ratio. Note: May spread slightly more |
| All Purpose Flour | 1:1 gluten-free Blend | Mimics wheat structure. Note: Denser texture |
| Granulated Sugar | Caster Sugar | Dissolves faster for a smoother finish |
| Pure Vanilla Extract | Vanilla Bean Paste | More intense flavor with visible seeds |
Essential Kitchen Tools
You don't need a professional kitchen to make these, but a few tools make the process foolproof. I highly recommend a digital scale for the flour; measuring by the cup can be tricky because you might pack the flour down, leading to a dry cookie.
A stand mixer such as KitchenAid is great for the creaming stage, but a hand mixer works just as well. You'll also need a baking sheet lined with parchment paper or a silicone mat. This prevents sticking and makes cleanup a breeze.
Finally, have a cookie scoop or a tablespoon ready. Consistency in size means every cookie finishes baking at the exact same time. There is nothing worse than half your batch being burnt while the other half is raw.
From Prep to Plate
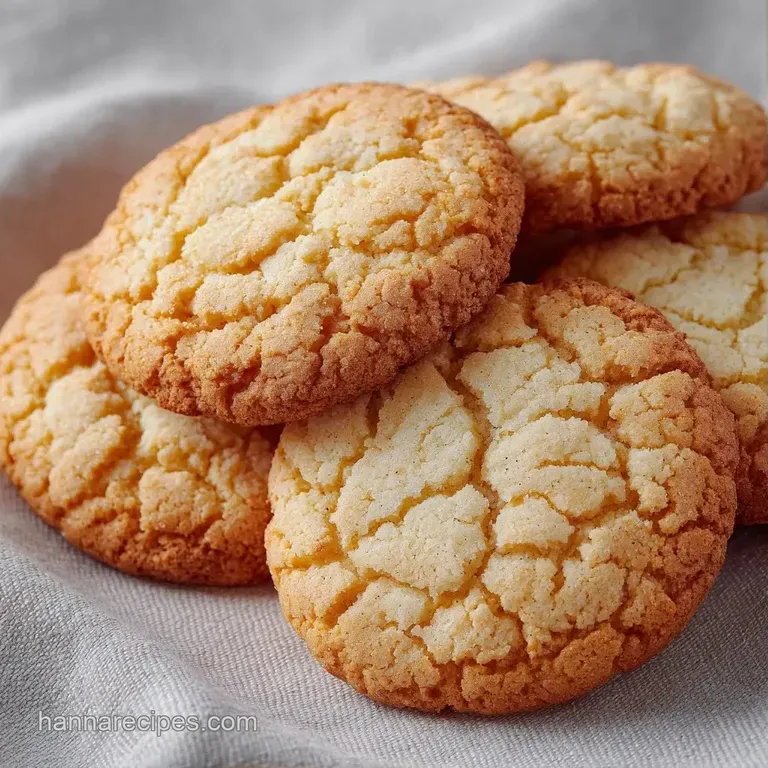
Follow these steps exactly for the best results. Pay close attention to the visual cues in each step.
- Cream the softened butter and granulated sugar on medium high speed. Mix for 3 minutes until the color is pale and fluffy.Note: This creates the air pockets needed for lift.
- Beat in the eggs one at a time. Wait until the first egg is fully absorbed before adding the second.
- Stir in the pure vanilla extract. Mix until the batter looks glossy and smooth.
- Whisk the flour, baking soda, and salt in a separate bowl. Note: This ensures the baking soda is evenly distributed.
- Turn the mixer to the lowest setting and gradually add the flour mixture. Stop as soon as the white streaks disappear.
- Use a spatula to fold in any remaining bits of dough by hand. Note: Overmixing here will make the cookies tough.
- Scoop rounded tablespoons of dough (about 2 tbsp each). Place them 2 inches apart on lined baking sheets.
- Bake at 350°F (175°C) for 9-11 minutes. Remove when edges are barely golden but centers look slightly underbaked.
- Let the cookies firm up on the hot pan for 5 minutes before moving them to a wire rack. Note: They finish cooking on the pan via carryover heat.
Pro Tips and Pitfalls
The most common mistake I see is overbaking. If the center looks "done" in the oven, the cookie will be hard once it cools. You want that slightly soft, almost raw look in the middle when you pull them out.
Another issue is butter temperature. If you microwave your butter and it melts, the emulsion breaks. You'll get a greasy cookie that spreads into a flat disc. Butter should be "cool room temperature," meaning you can press it and it leaves a mark, but it doesn't slide around the bowl.
Troubleshooting Common Issues
| Issue | Solution |
|---|---|
| Why Your Cookies Spread | This usually happens because the butter was too warm or the oven wasn't fully preheated. When the butter melts before the flour structure sets, the cookie collapses. |
| Why Your Dough is Sticky | If the dough sticks to everything, you might have used too much vanilla or your eggs were too large. Don't just keep adding flour, or you'll lose the tenderness. |
| Why Cookies are Too Hard | Overmixing the flour develops too much gluten, turning your cookie into a biscuit. Also, leaving them in the oven for even 60 seconds too long can dry them out. |
Common Mistakes Checklist
- ✓ Did you cream the butter for the full 3 minutes?
- ✓ Are the eggs at room temperature?
- ✓ Did you stop mixing the moment the flour disappeared?
- ✓ Are the cookies spaced 2 inches apart?
- ✓ Did you remove them while the centers still looked soft?
Make It Your Own
Once you have this base down, you can get creative. This Vanilla Extract Cookie Recipe is a blank canvas. If you want to turn these into vanilla chocolate chip cookies, just fold in 1 cup of semi sweet chips at the very end.
For a citrus twist, add the zest of one lemon to the sugar before creaming. The acidity of the lemon brightens the vanilla and makes the cookies feel lighter. If you're planning a bigger dessert spread, these pair beautifully with a slice of authentic Black Forest cake for a mix of creamy and crisp textures.
If you want a crunchier cookie, bake them for an extra 2 minutes and spread the dough balls slightly flatter with your palm before putting them in the oven. This increases the surface area and allows more moisture to evaporate.
Adjusting the Batch Size
If you're only baking for yourself, you can halve the recipe. Beat one egg in a small bowl first, then use half of it (about 2 tablespoons). Reduce the bake time by about 20% since there's less mass in the oven.
When doubling the recipe, don't double the salt or baking soda exactly use about 1.5x the amount to avoid a chemical aftertaste. Work in batches so you don't overcrowd your mixer, which can lead to unevenly mixed dough.
| Original Batch | Scaling Factor | Adjustment |
|---|---|---|
| 22 Cookies | 1/2 Batch | Use half an egg, reduce time slightly |
| 22 Cookies | 2x Batch | 1.5x salt/soda, bake in batches |
| 22 Cookies | 4x Batch | Reduce liquids by 10%, use large mixer |
Baking Truths
Some people think that "room temperature" butter can be achieved by melting it in the microwave for 10 seconds. This is a myth. Melted butter changes the way the sugar interacts with the fat, leading to a denser, oilier cookie.
Another common misconception is that you should keep cookies in the oven until the center is firm. In reality, the cookies continue to cook on the hot baking sheet after you remove them. If they feel firm in the oven, they will be rock hard by the time they cool.
Finally, some believe that using "extra fine" flour makes the cookie softer. While it can help, the softness actually comes from the ratio of fat to flour and avoiding the development of gluten through overmixing.
Preservation Secrets
To keep these cookies soft, store them in an airtight container with a small piece of white bread. The cookies will absorb the moisture from the bread, keeping them pillowy for days.
Storage Guidelines
- Fridge: 5 days in a sealed container.
- Freezer: 3 months. Freeze the baked cookies or the raw dough balls.
- Reheating: 10 seconds in the microwave for that "just baked" softness.
For zero waste, don't toss your vanilla bean pods if you use them to make your own extract. You can dry them out and grind them into a powder to add to your sugar jars. Even the scrapings from the bottom of the mixing bowl can be rolled into "mini cookies" for a quick snack.
Pairing Ideas
Vanilla is a classic for a reason it goes with everything. For a simple afternoon snack, a cold glass of whole milk is the standard. The fat in the milk cuts through the sweetness of the sugar and cleanses the palate between bites.
If you're serving these at a party, try a dessert platter with fresh raspberries and a drizzle of melted dark chocolate. The tartness of the berries balances the creamy vanilla notes perfectly.
For adults, a cup of strong black coffee or a bold espresso is the way to go. The bitterness of the coffee enhances the floral qualities of the pure vanilla extract, making the flavor profile feel more complex and less sugary.
Recipe FAQs
What does vanilla extract do to cookies?
It enhances the sweetness of the sugar and balances the richness of the butter. It provides a floral aroma that deepens the overall flavor profile.
How to make these vanilla cookies?
Cream butter and sugar for 3 minutes, beat in eggs and vanilla, then fold in the flour mixture. Bake at 350°F (175°C) for 9-11 minutes.
How to make thick and chewy cookies?
Remove them from the oven when the centers still look slightly underbaked. They will firm up on the hot pan to preserve the chewy texture. If you enjoyed controlling the texture here, the same principle applies to our vanilla rich cookies.
Why are my cookies spreading too much?
Your butter was likely too warm or the oven wasn't fully preheated. This causes the fat to melt before the flour structure can set, leading to a collapse.
Is it true I should keep adding flour if the dough is sticky?
No, this is a common misconception. Adding too much flour ruins the tenderness; stickiness is typically caused by large eggs or extra vanilla.
Why are my cookies too hard?
You likely overmixed the flour or left them in the oven too long. Overmixing develops excess gluten, which turns the cookie into a hard biscuit.
How to tell when the cookies are done?
Look for edges that are barely golden while the centers remain soft. This ensures they stay tender after they finish firming up on the pan.
Vanilla Extract Cookie Recipe