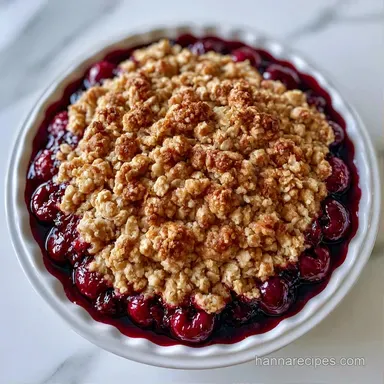
Simple Cherry Dessert: Fresh Cherry Crisp
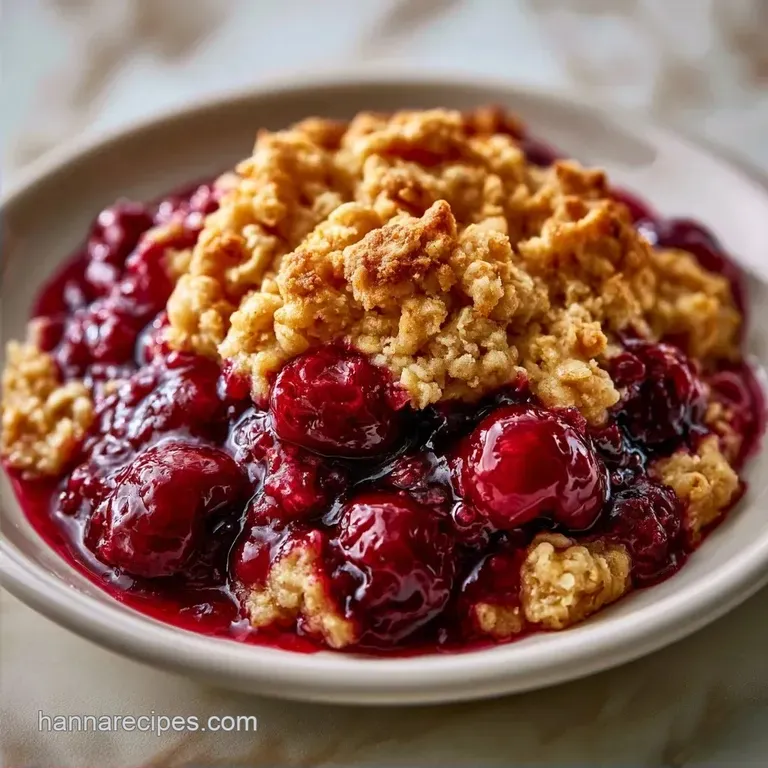
- Time: 15 min active + 35 min baking
- Flavor/Texture Hook: Bubbling tart fruit under a mahogany gold, crunchy crust
- Perfect for: Summer potlucks, beginner bakers, or a quick weeknight treat
Ever wonder why home cooked fruit desserts sometimes turn into soup? Most people think you need a can of thick, sugary pie filling to get that glossy, jammy consistency, but that's just not true. You can get that same texture using fresh fruit and a few basic pantry staples.
The smell of bubbling cherries and cinnamon hitting the oven air is honestly the best part of the process. It fills the whole house and makes everything feel cozy, even in the middle of July. I used to struggle with watery fillings, but once I figured out the timing, it became a staple.
This Simple Cherry Dessert is designed to be a low stress bake. You don't need a fancy mixer or professional tools, just a bowl and a fork. It's a reliable way to use up a harvest of fresh cherries while keeping the sugar levels reasonable.
Why the Texture Works
Cornstarch Activation: The starch needs heat and a bit of acid from the lemon juice to bond with the fruit juices. This creates a thick glaze instead of a watery puddle.
Honey Binding: Using honey in the crumble helps the oats and almond flour clump together. It creates those little nuggets of crunch rather than a sandy layer of crumbs.
Almond Flour Lift: Almond flour adds a richness that regular flour lacks. It makes the topping feel lighter and adds a nutty depth that pairs with the tart fruit.
| Method | Time | Texture | Best For |
|---|---|---|---|
| Oven Bake | 35 mins | Crunchy top, bubbling base | Classic crowd pleaser |
| Stovetop | 15 mins | Soft fruit, no crust | Quick porridge style |
I've found that the oven method is the only way to get that specific contrast between the hot fruit and the crisp topping. While a stovetop version is faster, you lose the mahogany gold color that makes this Simple Cherry Dessert so appealing.
Recipe Specs
This recipe makes about 6 servings. It takes 15 minutes to prep and 35 minutes to bake, making the total time 65 minutes. For the best results, use a standard 8x8 inch baking dish.
The temperature stays at 350°F (175°C) throughout the process. If your oven runs hot, keep a close eye on the almonds in the topping, as they can go from gold to burnt quickly.
Ingredient Deep Dive
| Ingredient | What It Does | Best Swap |
|---|---|---|
| Fresh Cherries | Provides the tart, juicy base | Frozen cherries (thawed) |
| Cornstarch | Thickens the fruit juices | Arrowroot powder |
| Coconut Oil | Binds the crumble | Unsalted butter |
| Almond Flour | Adds nuttiness and structure | Oat flour |
When choosing your fruit, the balance of sweet and tart is key. If your cherries are very sweet, add an extra squeeze of lemon juice to keep the Simple Cherry Dessert from tasting one dimensional.
Equipment Needed
You only need a few basics for this. A medium mixing bowl is essential for tossing the fruit and mixing the crumble. I use the same bowl for both to save on dishes, which is a total win.
An 8x8 inch baking dish is the standard here. If you use a larger pan, the fruit layer will be too thin and might evaporate too quickly. A simple fork is all you need to mash the topping into clumps.
Step-by-step Instructions
- Combine the pitted cherries, cornstarch, lemon juice, honey, and cinnamon in a medium bowl.
- Stir until the cherries are evenly coated in the starch mixture to ensure a velvety sauce. Note: This prevents the cornstarch from clumping in one spot.
- Pour the cherry mixture into an 8x8 inch baking dish, spreading them into an even layer.
- Mix the rolled oats, almond flour, sea salt, and sliced almonds in the same bowl.
- Add the softened coconut oil and honey to the dry ingredients.
- Use a fork to mash the ingredients until the mixture forms small, pea sized clumps.
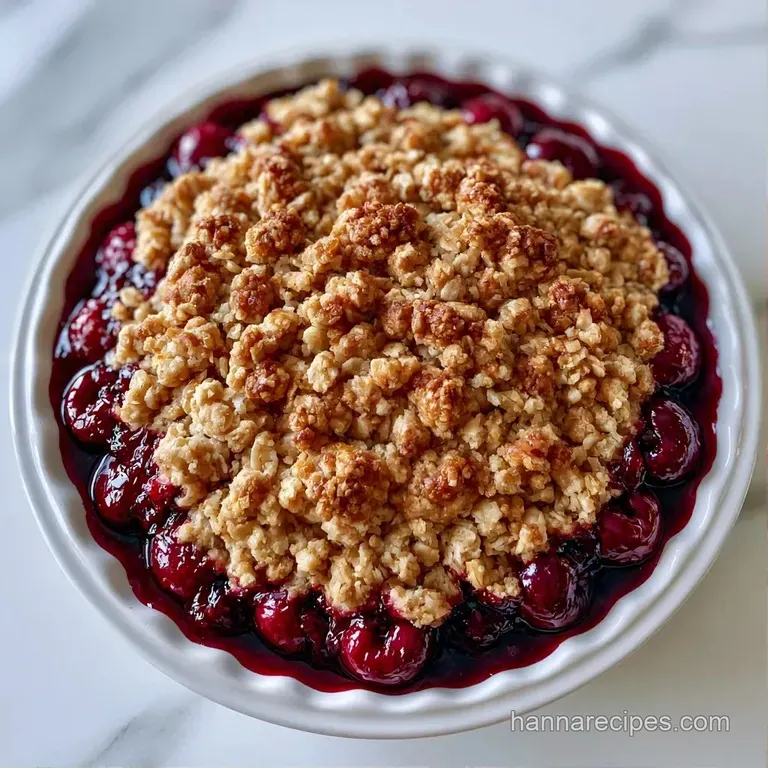
- Sprinkle the crumble evenly over the cherry base, leaving a tiny gap at the edges to prevent overflow.
- Place in a preheated oven at 350°F (175°C) and bake for 30–35 minutes.
- Remove when the fruit is bubbling vigorously around the edges and the topping has turned a deep mahogany gold.
- Let the dessert rest for at least 15 minutes before serving to allow the sauce to thicken. Note: Cutting into it too early will lead to a runny filling.
How to Fix Common Problems
Fixing a Runny Filling
If the sauce is too thin after baking, it's usually because the cherries were extra juicy. The fix is patience. According to Serious Eats, starches need time to set as they cool. Let it sit for 20 minutes instead of 15.
Preventing Topping Burn
Almonds and honey can brown quickly. If the top looks dark but the fruit isn't bubbling , loosely cover the dish with aluminum foil. This protects the crust while the bottom continues to cook.
Solving Bland Fruit
If the filling tastes flat, it's likely lacking acid. Stir in a teaspoon of lemon juice or a pinch more salt to the fruit before baking. This wakes up the natural sugars in the cherries.
Flavor Variations to Try
For a deeper flavor, try using frozen sour cherries. They often have a more intense tang than fresh sweet cherries, which makes for a more complex Simple Cherry Dessert.
If you want something even more rustic, you can follow the logic of a Cherry Crumble recipe and add a handful of walnuts to the topping.
Adding a Vanilla Twist
Stir half a teaspoon of vanilla bean paste into the fruit mixture. It adds a floral note that rounds out the cinnamon.
Making it Vegan
This Simple Cherry Dessert is already vegan friendly as long as you use a vegan certified honey alternative like maple syrup or agave.
| Goal | What to change |
|---|---|
| More Crunch | Increase sliced almonds by 2 tbsp |
| Tartest Flavor | Use 100% Montmorency cherries |
| Lower Sugar | Replace honey with date syrup |
Depending on your taste, you can also swap the coconut oil for grass fed butter if you aren't avoiding dairy. The butter adds a classic pastry smell that is hard to beat.
How to Store and Keep Fresh
Place any remaining dessert in a sealed container and keep it refrigerated for up to 4 days. The topping may lose some crunch as it absorbs moisture from the fruit; to fix this, warm a slice in the toaster oven for 3 minutes.
This Simple Cherry Dessert stays fresh in the freezer for up to 2 months. For easy serving, freeze individual squares on a tray before bagging them so they don't stick together.
If you want a different cherry treat, try this No Bake Cherry Delight on days when you'd prefer not to use the oven.
To embrace zero waste, save your cherry pits. After drying them, you can use a large quantity to brew a natural pit-infused syrup for cocktails or sodas.
Presentation Tips
Serve this Simple Cherry Dessert while it's still warm. Topping it with vanilla bean ice cream is a traditional choice, as the chilled cream blends beautifully with the bubbling hot sauce.
For the neatest presentation, use a sharp knife to slice the dessert into clean squares. Be sure to wipe the blade after every cut to prevent the fruit from smearing into the topping.
Garnishing with a sprig of fresh mint or a few halved cherries provides a vibrant red contrast that makes the mahogany crust pop. It's a minor detail that gives the treat a professional, cafe style finish.
Recipe FAQs
Should I use extra honey if my cherries are tart?
Yes, adding a bit more honey effectively balances the acidity of sour cherries. This ensures the dessert remains sweet without overpowering the natural fruit flavor.
How to make the cherry filling taste better?
Stir in the lemon juice and cinnamon thoroughly before baking. These ingredients brighten the fruit and add a subtle warmth. If you liked the way we balanced tartness here, you can use a similar approach in our no-churn cherry ice cream.
Is it true that cornstarch creates a chalky texture in the filling?
No, and here's why. When heated until bubbling at 350°F, the starch gelatinizes to create a smooth, velvety sauce.
Which type of cherries are best for this recipe?
Use fresh, pitted cherries to maintain a firm texture. Frozen options release excess moisture that often makes the fruit base too runny.
What prevents the topping from becoming soggy?
Leave a small gap at the edges of the baking dish to stop juices from overflowing. This helps the crust maintain its mahogany gold crispness during the bake.
Simple Cherry Dessert Crisp