No Bake Cheesecake: Creamy and Classic
- Foolproof Science Behind This No Bake Cheesecake Recipe
- Why This Recipe Works
- Technical Specs for Silky Success
- Selecting Your High Fat Elements
- Essential Gear for Proper Aeration
- Step-by-Step Method for No Fail Results
- Solving Common Texture Issues
- Flavor Variations and Scaling Tips
- Storage and Zero Waste Methods
- Professional Garnish and Serving Ideas
- Common Myths
- Recipe FAQs
- 📝 Recipe Card
Foolproof Science Behind This No Bake Cheesecake Recipe
The classic no bake cheesecake recipe is a fascinating slice of American culinary history. While traditional European cheesecakes rely on the slow, steady heat of an oven and the structural binding of eggs, the no bake version emerged as a triumph of the "icebox cake" era.
In the mid-20th century, home cooks looked for ways to capture the velvety decadence of a New York style cake without the stress of a water bath or the inevitable worry over surface cracks.
This dish represents a shift toward convenience that didn't sacrifice luxury, using refrigeration as a tool to set fats and create a mousse like consistency that feels lighter on the palate than its baked cousins.
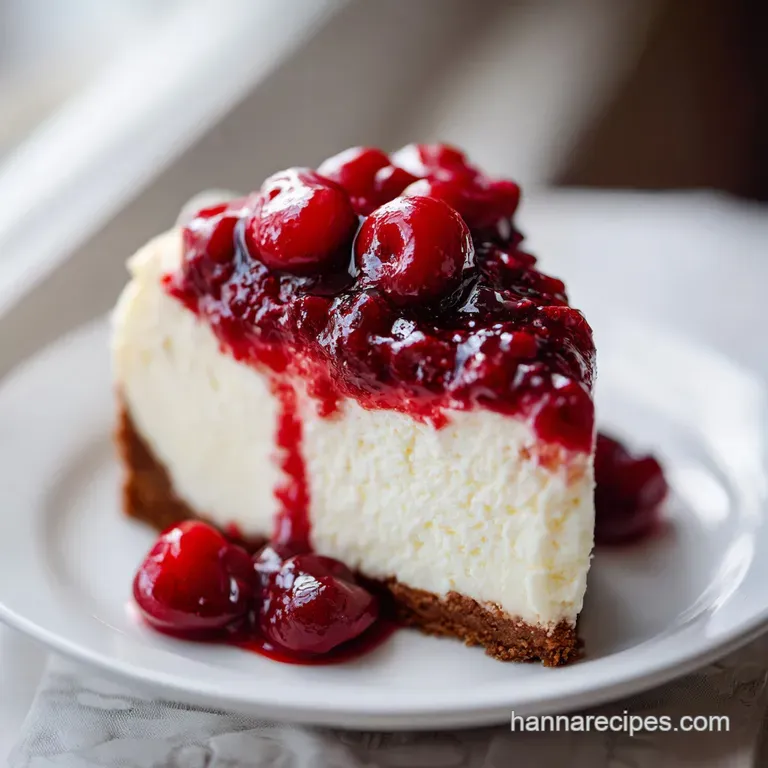
We are looking at a dessert that relies entirely on structural engineering through temperature and aeration. When you take that first bite, you get the distinct shatter of a cold, buttery graham cracker crust followed by a filling that is undeniably silky.
It doesn't have the dense, custard like weight of a baked cake, but instead offers a refreshing, tangy creaminess that makes it the ultimate finish for a heavy dinner. The cultural shift from labor intensive baking to "set and forget" chilling transformed the cheesecake from a specialty bakery item into a staple of the home kitchen.
This specific method is focused on preventing the most common failure: a runny center. By understanding how the lipids in the cream cheese interact with the air bubbles in the whipped cream, we can skip the gelatin entirely. Most people think they need a chemical binder, but the reality is much simpler.
It is all about the ratios of fat and the precision of your chill time. This recipe is designed to be foolproof, providing a stable, sliceable result that holds its shape even on a warm afternoon.
Why This Recipe Works
Making a cheesecake without an oven feels like a bit of kitchen magic, but the physics is quite solid. We are essentially building a stable foam and then suspending it in a matrix of chilled fats. Here is why this specific approach yields a result that won't collapse when you unlatch the springform pan.
- Lipid Solidification: The high saturated fat content in full fat cream cheese and butter acts as the primary structural support. Once chilled to 40°F (4°C), these fats transition from a soft state to a firm solid, "locking" the other ingredients in place.
- Air Suspension: By whipping heavy cream to stiff peaks, we are creating millions of tiny air bubbles trapped in a protein and fat web. Folding this into the cheese base provides volume and lightness that prevents the cake from feeling like a block of plain cheese.
- Hygroscopic Balance: Using confectioners' sugar is vital because it contains a small amount of cornstarch. This helps absorb any excess moisture from the sour cream and lemon juice, further stabilizing the filling as it sets.
- Acid Denaturation: The lemon juice does more than just add a bright note. The acid reacts with the proteins in the dairy, causing them to tighten slightly, which assists in the firming process during the six hour chill.
| Method | Texture | Best For | Prep Difficulty |
|---|---|---|---|
| No Bake | Mousse like, airy | Summer, quick prep | Beginner friendly |
| Stovetop (Custard) | Silky, pudding like | Small portions | Intermediate |
| Oven Baked | Dense, rich | Traditional events | Advanced |
The choice between methods usually comes down to the texture you prefer. While the oven baked version is a classic, many people actually prefer the lighter, more refreshing feel of this no bake approach, especially when paired with fresh fruit. If you ever crave that denser, traditional texture, you might want to try a baked cheesecake for a different experience.
Technical Specs for Silky Success
Precision is the best friend of any home cook. While we aren't using a thermometer for an oven, we are using a clock and a scale to ensure the chemistry of the dairy works in our favor. Skipping a chill step or using the wrong temperature ingredients is the fastest way to a soupy mess.
| Component | Goal | Numeric Checkpoint | Visual/Sensory Cue |
|---|---|---|---|
| Crust | Structural Base | 15 minutes freeze | Feels like cold stone to the touch |
| Heavy Cream | Aeration | Stiff peaks | Cream stands straight up on the whisk |
| Setting Time | Stability | 6 hours minimum | Filling doesn't jiggle when pan is shaken |
Stability Without Using Gelatin
Most recipes that skip gelatin end up being too soft to slice neatly. The secret here is the 24 ounces of full fat cream cheese combined with the 0.5 cup of sour cream. This specific ratio ensures there is enough solid fat to maintain a vertical edge once the cake is sliced.
Achieving a Crisp Base
A soggy crust is a common complaint with no bake desserts. We solve this by using 6 tablespoons of melted butter and 0.25 cup of brown sugar. The sugar acts as a glue, and the 15 minute freeze "sets" that glue before the wet filling ever touches it, creating a moisture barrier.
Balanced Tang and Sweetness
The inclusion of 1 tablespoon of lemon juice and 2 teaspoons of vanilla extract creates a complex flavor profile. The acidity cuts through the 38g of fat per serving, ensuring the dessert feels bright rather than cloying.
Selecting Your High Fat Elements
The quality of your dairy will dictate the final result of this no bake cheesecake recipe. Since we aren't cooking the ingredients, their natural flavors and textures are on full display. Do not opt for "low-fat" or "light" versions here, as they contain higher water content and will prevent the cake from setting.
| Component | Science Role | Pro Secret |
|---|---|---|
| Cream Cheese | Structural Matrix | Use blocks, never the "whipped" tub version |
| Heavy Cream | Volume/Lightness | Keep it at 35°F until the very second you whip it |
| Confectioners' Sugar | Sweetener/Stabilizer | Sift it to prevent "sugar pockets" in the filling |
| Sour Cream | Tang/Moisture | Use full fat for the best emulsification |
- 1.5 cups graham cracker crumbs: The foundation. You can crush these yourself or buy them pre ground.
- 6 tbsp unsalted butter, melted: Acts as the binder for the crust.
- 0.25 cup light brown sugar: Adds a molasses note and helps the crust stay together.
- 0.25 tsp fine sea salt: Essential to balance the sugar in the crust.
- 24 oz full fat block cream cheese, softened: The body of the cake.
- 1 cup confectioners' sugar: Provides sweetness and a tiny bit of starch for stability.
- 1.5 cups heavy whipping cream, cold: Crucial for that airy, mousse like texture.
- 0.5 cup full fat sour cream: Adds the traditional cheesecake tang.
- 1 tbsp fresh lemon juice: Brightens the flavor and helps the proteins set.
- 2 tsp pure vanilla extract: Rounds out the dairy notes with warmth.
Chef's Tip: Take your cream cheese out of the fridge at least 2 hours before you start. If it has even a tiny chill, it will stay lumpy no matter how much you beat it. On the flip side, keep your heavy cream in the coldest part of the fridge until the moment it goes into the bowl.
Essential Gear for Proper Aeration
You don't need a professional kitchen, but a few specific tools make the difference between a lumpy cheesecake and a velvety one. The most important piece of equipment is a 9 inch springform pan. Without the removable sides, you will never get a clean slice of this cake out of a standard pie dish.
- 9 inch Springform Pan: Essential for easy removal and presentation.
- Electric Hand Mixer or Stand Mixer: Necessary to achieve the stiff peaks in the cream and the smoothness in the cheese.
- Flat bottomed Measuring Cup: My favorite trick for pressing the crust. It gets the corners much tighter than your fingers ever could.
- Large Mixing Bowls: You will need at least two: one for the cream and one for the cheese base.
- Sifter: Don't skip this for the powdered sugar. Even small lumps will ruin the texture.
- Rubber Spatula: For the "gentle fold." A whisk will deflate the air you worked so hard to get into the cream.
- Offset Spatula: Ideal for getting a perfectly flat, professional looking top.
step-by-step Method for No Fail Results
Follow these steps exactly as written. The order of operations is designed to manage temperatures and air retention, which are the two pillars of a successful no bake dessert.
Constructing the Graham Foundation
- Mix the base: In a medium bowl, combine 1.5 cups graham cracker crumbs, 6 tablespoons melted butter, 0.25 cup light brown sugar, and 0.25 teaspoon salt until it resembles wet sand.
- Compress the crust: Press the mixture firmly into the bottom and slightly up the sides of your 9 inch springform pan. Note: Use a flat bottomed cup to ensure the base is even and compact.
- Flash freeze: Place the pan in the freezer for 15 minutes. This solidifies the butter and creates a sturdy wall for the filling.
Whipping the Cream Peak
- Aerate the cream: In a chilled large bowl, beat 1.5 cups cold heavy whipping cream with an electric mixer until stiff peaks form. Note: Stiff peaks mean the cream stands straight up when the beaters are lifted. Set this aside in the fridge.
Emulsifying the Cheese Base
- Cream the cheese: In a separate large bowl, beat 24 ounces of softened cream cheese and 1 cup sifted confectioners' sugar together until completely smooth and creamy. Stop when there are zero lumps.
- Add aromatics: Beat in 0.5 cup sour cream, 1 tablespoon lemon juice, and 2 teaspoons vanilla extract until fully incorporated.
The Gentle Final Fold
- Combine the layers: Gently fold the chilled whipped cream into the cream cheese mixture using a spatula. Move in a circular motion, lifting from the bottom and folding over the top. Do this until no white streaks remain.
- Smooth and set: Spread the filling evenly over the frozen crust. Use an offset spatula to level the top.
- The long chill: Cover the pan and refrigerate for at least 6 hours. Overnight is even better for the cleanest slices.
Solving Common Texture Issues
Even with a clear plan, dairy can be temperamental. Most issues with this recipe come down to either temperature or the "folding" technique. If your filling feels more like a thick soup than a firm mousse, it's usually because the air was knocked out of the cream or the cheese was too warm to hold its shape.
Fixing a Runny Filling
If you have waited 6 hours and the center is still wobbly, the heavy cream likely wasn't whipped to a true stiff peak, or the cream cheese was a "spread" variety instead of a block.
You can sometimes save this by putting it in the freezer for 45 minutes before serving, though the texture will be closer to an ice cream cake.
Repairing a Crumbly Crust
A crust that falls apart usually lacks compression. If you find your crust is messy, next time, make sure you press down with significant force using a flat object. The butter acts as the mortar, but it needs pressure to bind the crumbs together.
| Problem | Root Cause | Solution |
|---|---|---|
| Lumpy Filling | Cold cream cheese | Ensure cheese is room temp before mixing |
| Soggy Crust | Warm filling on soft crust | Always freeze the crust for 15 minutes first |
| Grainy Texture | Un sifted sugar | Always sift confectioners' sugar through a fine mesh |
Common Mistakes Checklist
- ✓ Sift the powdered sugar every single time to avoid gritty pockets.
- ✓ Use full fat, brick style cream cheese (the tub stuff is too watery).
- ✓ Stop folding the second the streaks disappear to keep the air in.
- ✓ Wipe your knife with a warm, damp cloth between every single slice for a clean edge.
- ✓ Do not substitute granulated sugar for confectioners' sugar; it won't dissolve properly.
Flavor Variations and Scaling Tips
One of the best things about this recipe is its versatility. Once you have the base stabilized, you can treat it like a canvas for different flavors. For a party sized alternative with a similar cream cheese base but a fun twist, these fruit pizza cookies are a massive hit and use many of the same ingredients.
Dark Chocolate Infusion Strategy
To turn this into a chocolate version, melt 6 ounces of high-quality semi sweet chocolate and let it cool to room temperature (but still liquid). Fold it into the cream cheese mixture in step 5 before adding the whipped cream. This adds even more stability to the final cake because chocolate hardens when cold.
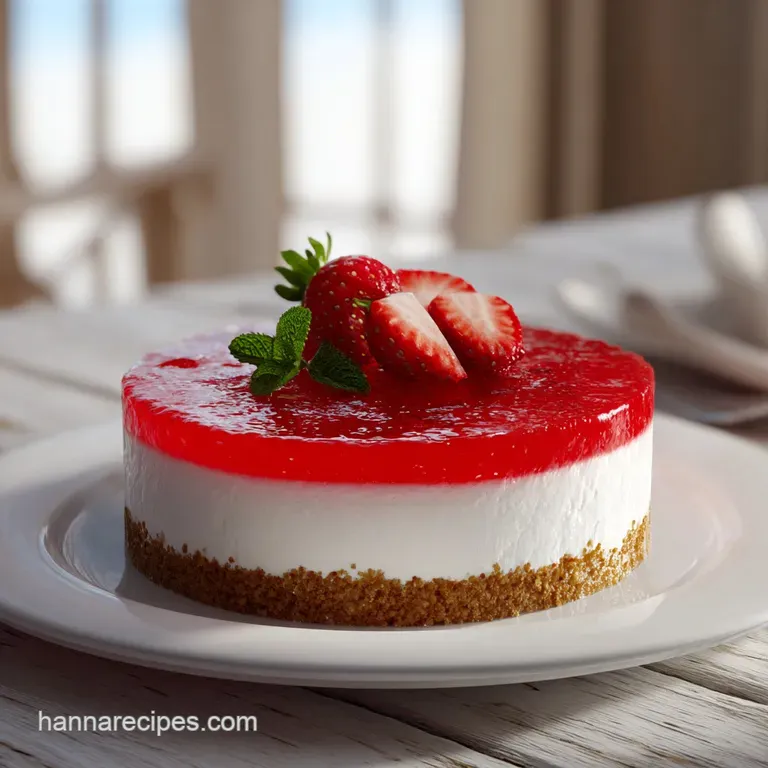
Seasonal Fruit Topping Ideas
A simple berry compote works wonders. Simmer 2 cups of frozen berries with a splash of lemon and a tablespoon of sugar until thickened. Let it cool completely before spooning it over the chilled cheesecake. Never add warm toppings to a no bake cake, or it will melt instantly.
Scaling Guidelines:Cutting in half: Use a 6 inch springform pan. Follow the measurements exactly, using 12 oz of cream cheese and 0.75 cups of cream. The chill time remains the same. Doubling the batch: If making two 9 inch cakes, double all ingredients.
However, whip the heavy cream in two separate batches to ensure you get the maximum volume and "stiff peak" stability.
Storage and Zero Waste Methods
Because this recipe is dairy heavy and uncooked, proper storage is non negotiable for both safety and texture. The fats in the cheese and cream are highly porous, meaning they will absorb any smells from your fridge (like onions or garlic) if not tightly sealed.
Fridge Storage: Keep the cheesecake in the springform pan or an airtight container for up to 5 days. I recommend keeping it in the back of the fridge where the temperature is most consistent.
Freezer Storage: This cake freezes remarkably well. Wrap the entire cake (or individual slices) in plastic wrap, then a layer of foil. It will stay fresh for up to 3 months. To serve, thaw in the fridge for 2 hours.
Do not thaw at room temperature, or the edges may become mushy before the center softens.
Zero Waste Tip: If you have leftover graham cracker crumbs, toss them with a little extra melted butter and cinnamon. Bake them for 5 minutes at 350°F (180°C) and use them as a "dessert sand" over yogurt or vanilla ice cream.
Any leftover whipped cream can be folded into your morning coffee for a luxurious start to the day.
Professional Garnish and Serving Ideas
To get those restaurant quality slices, you need to manage the friction of the knife. Because the filling is so creamy, a dry knife will "drag" the filling down into the crust, ruining the clean lines.
For Restaurant Quality Slices
Fill a tall glass with hot water. Dip a long, thin knife into the water, wipe it dry, and make your first cut. Repeat this dipping and wiping for every single slice. This "hot blade" technique melts the fats just enough to slide through the cake like a hot wire through wax.
It sounds tedious, but the visual result is worth the extra 60 seconds.
The "Deconstructed" Garnish
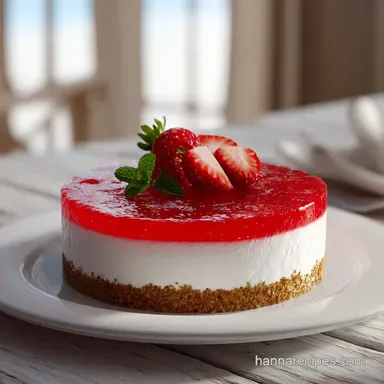
Instead of just plopping fruit on top, try a more modern approach. Zest a fresh lemon over the top just before serving for an aromatic boost. You can also crush a few extra graham crackers and sprinkle them around the bottom edge of the cake once it's on the serving platter to hide any imperfections from the pan removal.
For a final touch, a few mint leaves and a light dusting of sifted powdered sugar can transform a simple home dessert into something that looks like it came from a high end bistro.
Just remember to add these garnishes at the very last second, as the moisture in the cake will dissolve the sugar and wilt the mint if left too long.
Common Myths
There are several misconceptions about no bake desserts that often lead people to overcomplicate the process.
"No bake cheesecake is just pudding in a crust." This is false. A pudding relies on starch (like cornstarch or flour) and heat to thicken. This recipe relies on the emulsion of fat and air. The texture is much closer to a dense mousse or a Chantilly cream than it is to a pudding.
"You need gelatin to make it sliceable." While gelatin is a helpful insurance policy, it's not a requirement. If your fat ratios are high enough and your heavy cream is whipped to stiff peaks, the natural saturated fats in the cream cheese will provide all the structure you need.
Gelatin can sometimes give the cake a "rubbery" texture that lacks the melt in-the mouth quality of a pure dairy version.
"Room temperature ingredients don't matter for no bake." This is actually the most dangerous myth. In a baked cake, the heat of the oven can eventually melt out lumps. In a no bake cake, if your cream cheese is cold when you mix it with the sugar, you will have tiny beads of unmixed cheese throughout the entire dessert.
There is no way to fix this once the whipped cream is folded in, so the "softened" step is the most important part of the whole process.

Recipe FAQs
What are the ingredients in 3 ingredient cheesecake?
This recipe requires more than three ingredients to ensure proper texture and structure. You must use the full list of ten ingredients provided, including cream cheese, heavy whipping cream, and sugar, to achieve the classic flavor and stability of a high-quality no-bake dessert.
What are the ingredients of a no-bake cheesecake?
You need a specific balance of dairy and binders to set the cake without baking. The essential components are graham cracker crumbs, melted butter, brown sugar, sea salt, full fat block cream cheese, confectioners' sugar, cold heavy whipping cream, sour cream, fresh lemon juice, and pure vanilla
extract.
Is cheesecake good for heart patients?
No, this dessert is high in saturated fats and calories. With 479 calories per serving and significant amounts of cream cheese and heavy whipping cream, it should be enjoyed only in moderation as an occasional treat.
What are common no-bake cheesecake mistakes?
The most frequent errors are using warm ingredients or rushing the setting time. Ensure your cream cheese is softened to room temperature for smoothness, but keep your heavy whipping cream cold to achieve stable stiff peaks, and always refrigerate for the full 6 hours to prevent a runny consistency.
How to ensure the filling is smooth and free of lumps?
Beat the softened cream cheese and sifted confectioners' sugar together until completely smooth before adding any other ingredients. Sifting the sugar first removes any clumps, and using an electric mixer ensures a uniform, creamy texture.
Is it true I can use low-fat cream cheese for this recipe?
No, this is a common misconception that leads to a failed set. low-fat versions have a higher water content and lower fat structure, which prevents the cheesecake from firming up properly; you must use full fat block cream cheese.
How to keep the cheesecake from absorbing fridge odors?
Cover the cake tightly with plastic wrap or store it in an airtight container immediately. Because of the high fat content in the cream and cheese, the dessert is porous and will quickly absorb surrounding smells if left exposed.
Classic No Bake Cheesecake
Ingredients:
Instructions:
Nutrition Facts:
| Calories | 479 kcal |
|---|---|
| Protein | 6g |
| Fat | 38g |
| Carbs | 29g |
| Fiber | 0.5g |
| Sugar | 21g |
| Sodium | 315mg |
