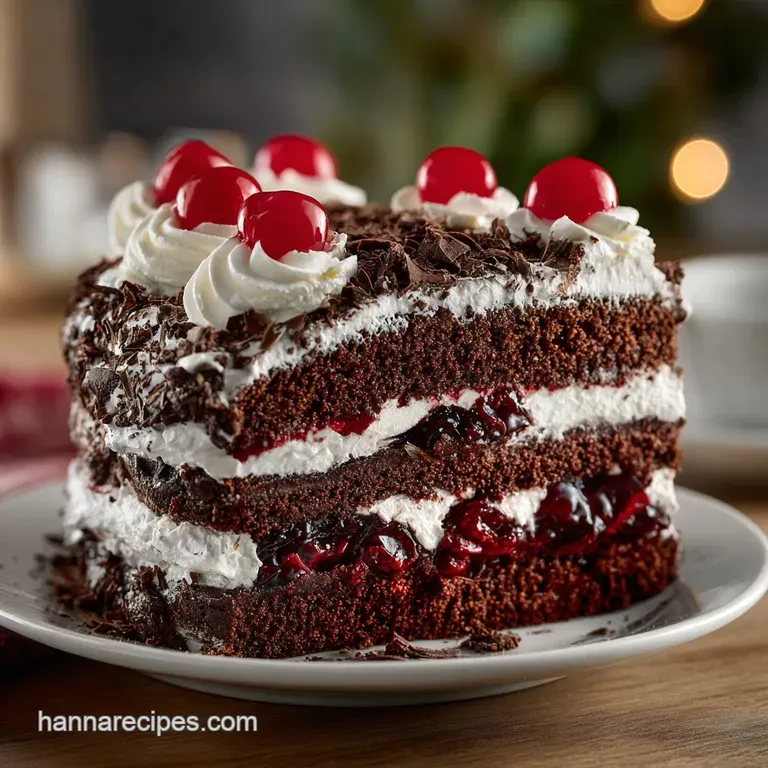
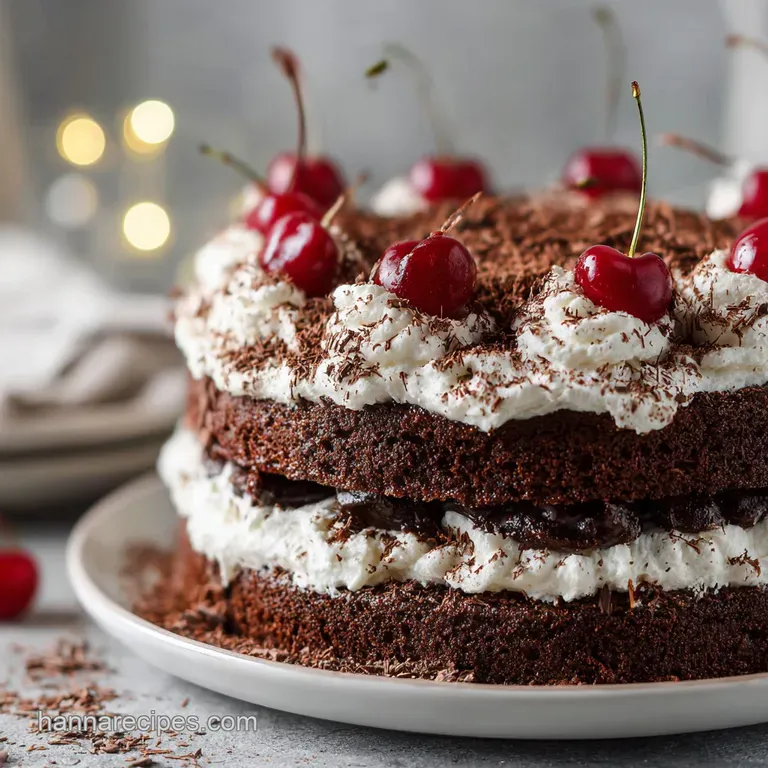
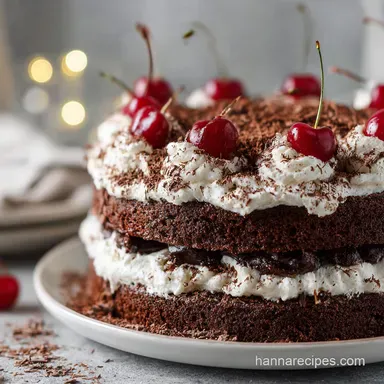
Black Forest Cake: Authentic and Moist
- Time:45 minutes active + 30 minutes cooking + 120 minutes chilling = 195 minutes total
- Flavor/Texture Hook: Velvety chocolate sponge paired with tart syrupy cherries and silky whipped clouds.
- Perfect for: Milestone celebrations, holiday centerpieces, or impressing seasoned bakers.
- Mastering the Structural Integrity of Your Black Forest Cake
- Why the Boiling Water Changes Everything
- Comprehensive Component Analysis and Ingredient Roles
- Selecting Premium Elements for the Moist Chocolate Sponge
- Precise Numerical Benchmarks for a Consistent Forest Cake Result
- Step-by-Step Construction of the Layered Masterpiece
- Troubleshooting Your Forest Cake for Flawless Results
- Adjusting the Recipe for Different Crowds and Occasions
- Debunking Common Myths About German Baking
- Storage Guidelines and Sustainable Kitchen Habits
- Perfect Complements for Your Dessert Spread
- Recipe FAQs
- 📝 Recipe Card
Mastering the Structural Integrity of Your Black Forest Cake
Forget everything you know about those dry, sugar choked versions of this dessert you find in the supermarket clearance aisle. There is a persistent myth that an authentic Schwarzwälder Kirschtorte must be a heavy, booze soaked brick to be "real," but that is simply not true.
A true, home baked version should feel like a velvety revelation, where the tartness of the cherries cuts through the richness of the cream with surgical precision. When you pull this out of the oven, the aroma of blooming cocoa and simmering Kirsch fills the kitchen, signaling that you have moved beyond basic baking into the territory of edible architecture.
We are aiming for a sponge that is so moist it almost defies physics, yet strong enough to support three layers of fruit and cream. Most people struggle because their cake is either too crumbly or their whipped cream turns into a puddle before the first slice is served.
We solve that today using specific temperature controls and a few stability tricks I have picked up over years of kitchen experimentation. You do not need a professional pastry degree to achieve those sharp, clean layers; you just need to understand how the ingredients interact with each other in the heat of the oven and the cold of the fridge.
This process is about more than just following a list; it is about the sensory cues that tell you the batter is ready or the cream has reached its peak. You will see the chocolate shavings shatter under your knife and smell the deep, earthy notes of the Morello cherries as they reduce.
This is baking as achievable magic, where we take simple elements like flour, sugar, and fat and transform them into a masterpiece that looks like it belongs in a high end German konditorei. Let's get into the mechanics of why this specific recipe works so flawlessly.
Why the Boiling Water Changes Everything
The Cocoa Bloom: Adding boiling water to the dry cocoa powder triggers an immediate release of flavor compounds that remain trapped in cold fats, ensuring a deep, dark chocolate profile. This process also dissolves any stubborn cocoa lumps, resulting in a batter that is perfectly homogenized and silky.
Leavening Activation: The hot liquid jump starts the reaction between the baking soda and the acidic buttermilk, creating a rapid initial rise in the oven. This creates a fine, uniform crumb structure that is less likely to have large, unstable air pockets.
Stabilized Fat Suspension: By whisking the oil and buttermilk into the dry ingredients before the water, we create a stable emulsion. This prevents the oil from leaking out of the cake during the bake, keeping the moisture locked inside the sponge fibers.
Protein Denaturation: The mascarpone added to the whipped cream provides extra milk solids and fat that reinforce the air bubbles. This ensures your frosting stays stiff and pipeable for hours, rather than weeping or sliding off the cake.
| Prep Method | Total Time | Sponge Texture | Best Application |
|---|---|---|---|
| Classic Scratch | 195 minutes | Velvety and damp | Formal events and traditional celebrations |
| Fast Variation | 85 minutes | Airy and light | Quick weeknight cravings or casual gatherings |
| make-ahead | 24 hours | Dense and fudgy | Large parties where slicing precision is key |
Comprehensive Component Analysis and Ingredient Roles
| Ingredient | Science Role | Pro Secret |
|---|---|---|
| Dutch Process Cocoa | Provides neutral pH and deep color | Sift twice to ensure maximum aeration in the sponge |
| Buttermilk | Acidic tenderizer for gluten | Use full fat for the most tender, melt in-mouth crumb |
| Boiling Water | Blooms cocoa and thins batter | Pour slowly to avoid "scrambling" the eggs in the mix |
| Mascarpone | High fat structural stabilizer | Keep it ice cold until the moment it hits the mixer |
Selecting Premium Elements for the Moist Chocolate Sponge
For the Moist Chocolate Sponge
- 250g all purpose flour: Why this? Provides the baseline protein structure without making the cake tough or bread like. (Sub: Cake flour for a more delicate, tender bite)
- 400g granulated sugar: Why this? Essential for moisture retention and creating a soft, tender crumb through hygroscopy. (Sub: Brown sugar for a deeper, molasses like undertone)
- 75g unsweetened Dutch process cocoa powder: Why this? Offers a smoother, darker chocolate flavor than natural cocoa powder. (Sub: Natural cocoa powder + 1/4 tsp extra baking soda)
- 2 tsp baking soda: Why this? Reacts with buttermilk to provide a powerful lift and dark color. (Sub: 6 tsp baking powder if buttermilk is unavailable)
- 1 tsp baking powder: Why this? Acts as a secondary leavener for a consistent, reliable rise. (Sub: Omit and increase baking soda by 1/2 tsp)
- 1 tsp sea salt: Why this? Sharpens the chocolate notes and balances the sweetness of the cherries. (Sub: Table salt, but use 3/4 tsp)
- 240ml buttermilk, room temperature: Why this? The acid breaks down gluten for an incredibly soft texture. (Sub: 240ml milk + 1 tbsp lemon juice)
- 120ml vegetable oil: Why this? Keeps the cake moist even when stored in the cold refrigerator. (Sub: Melted coconut oil for a subtle tropical hint)
- 2 large eggs, room temperature: Why this? Provides structure and emulsification for the liquid heavy batter. (Sub: 1/2 cup unsweetened applesauce for a denser cake)
- 2 tsp pure vanilla extract: Why this? Rounds out the cocoa flavors and adds a nostalgic aroma. (Sub: Vanilla bean paste for visual flecks)
- 240ml boiling water: Why this? Blooms the cocoa and ensures a smooth, lump free batter. (Sub: Strong hot coffee to intensify the chocolate profile)
For the Cherry Filling
- 700g jarred pitted sour cherries (Morello): Why this? The tartness is the signature contrast to the sweet whipped cream. (Sub: Frozen dark sweet cherries with reduced sugar)
- 50g granulated sugar: Why this? Helps create a glossy, thick syrup from the cherry juice. (Sub: Honey or agave for a different floral sweetness)
- 15g cornstarch: Why this? Thickens the filling so it doesn't run down the sides. (Sub: Arrowroot powder for a clearer, shinier glaze)
- 60ml Kirsch (Cherry Brandy): Why this? The traditional soul of the recipe; adds a complex fruit heat. (Sub: Cherry juice + 1/2 tsp almond extract for alcohol free)
For the Whipped Frosting & Garnish
- 720ml heavy whipping cream, cold: Why this? Creates the light, airy volume that defines the Forest Cake. (Sub: Coconut cream for a dairy-free alternative)
- 60g powdered sugar: Why this? Dissolves instantly into the cream without a gritty texture. (Sub: Superfine granulated sugar)
- 100g cold mascarpone: Why this? The "insurance policy" that prevents the cream from collapsing. (Sub: Full fat cream cheese, softened slightly)
- 1 tsp vanilla extract: Why this? Seasons the cream so it doesn't taste like plain air. (Sub: Almond extract for a nutty twist)
- 100g dark chocolate shavings: Why this? Adds texture and a bitter edge to the exterior decoration. (Sub: Chocolate sprinkles or cocoa nibs)
Precise Numerical Benchmarks for a Consistent Forest Cake Result
When we talk about precision, we aren't just being fussy. In the world of baking, a few degrees or grams can be the difference between a masterpiece and a mess. I always recommend using a digital scale for the flour and cocoa.
If you scoop flour with a measuring cup, you might pack it down and end up with 30% more than the recipe needs, leading to a dry cake.
For the oven, 350°F (175°C) is the sweet spot. It is hot enough to trigger the leavening agents but cool enough that the edges don't burn before the center is set. If your oven runs hot, your cake might dome and crack.
If it’s too cool, the structure won't set, and the cake will sink as soon as you pull it out.
Chilling is the most underrated "ingredient." You need 2 hours minimum in the fridge after assembly. This isn't just for temperature; it’s for the Kirsch and cherry juices to migrate slightly into the sponge, and for the fats in the mascarpone and cream to lock together.
If you slice it too early, the layers will slide apart like a tectonic shift on a plate.
step-by-step Construction of the Layered Masterpiece
1. Preparing the Foundation
Preheat your oven to 350°F (175°C). Grease three 8 inch round cake pans and line the bottoms with parchment paper. Note: Parchment is non negotiable here because the batter is very thin and the cake is extremely moist.
2. Combining the Dry Elements
Sift the 250g flour, 400g sugar, 75g cocoa, 2 tsp baking soda, 1 tsp baking powder, and 1 tsp sea salt into a large bowl. Note: Sifting prevents cocoa clumps that can leave bitter pockets in the finished sponge.
3. Emulsifying the Wet Ingredients
In a separate jug, whisk the 240ml buttermilk, 120ml oil, 2 eggs, and 2 tsp vanilla until the mixture is uniform and light yellow.
4. Integrating the Batter
Slowly pour the wet ingredients into the dry, stirring with a whisk until just combined. The mixture will look thick and pasty at this stage.
5. Blooming the Cocoa
Carefully stir in the 240ml boiling water. The batter will become very thin and watery. Note: Don't panic; this high hydration is what creates the velvety, damp texture we want.
6. The Baking Phase
Divide the batter evenly among the three pans. Bake for 30 minutes until a toothpick comes out clean or with a few moist crumbs. Cool in the pans for 10 mins before moving to wire racks to cool completely.
7. The Cherry Reduction
In a saucepan, simmer the 700g cherries, their juice, 50g sugar, and 15g cornstarch over medium heat. Stir constantly until the liquid turns translucent and thickens into a glossy syrup. Remove from heat and stir in the 60ml Kirsch. Let it cool to room temperature.
8. Whipping the Stabilized Clouds
Whisk the 720ml cold heavy cream, 60g powdered sugar, 100g cold mascarpone, and 1 tsp vanilla. Beat until the whisk leaves distinct tracks and stiff peaks form. Note: Stop immediately once stiff peaks are reached to avoid turning the cream into butter.
9. Precision Assembly
Place one cake layer on a plate. Spread a thin layer of cream, then half the cherry filling. Repeat with the second layer. Top with the final sponge.
10. The Finishing Touches
Cover the top and sides with the remaining whipped cream. Press the 100g chocolate shavings onto the sides and garnish with reserved cherries. Chill for 2 hours until the layers are firm and stable.
Troubleshooting Your Forest Cake for Flawless Results
Why Your Cake Layers Crack
If your sponge layers are cracking across the top, it is usually a sign of an oven that is too hot or over mixing the batter. When you over mix, you develop too much gluten, which creates a tough structure that can't expand gracefully.
The high heat causes the outside to set while the middle is still rising, forcing the air to burst through the crust.
Avoiding the "Slippery Layer" Syndrome
This happens when the cherry filling is too warm or the whipped cream isn't whipped enough. If you assemble the cake while the cherries are even slightly lukewarm, they will melt the fat in the cream, causing the layers to slide. Always ensure every component is cold before they touch each other.
| Problem | Root Cause | Solution |
|---|---|---|
| Sponge is too dry | Overbaked or too much flour | Use a scale for flour; check doneness 5 mins early |
| Filling is runny | Cornstarch not fully cooked | Ensure filling reaches a full boil for 1 minute |
| Cream is grainy | Over whipped the heavy cream | Fold in a splash of liquid cream to smooth it out |
Common Mistakes Checklist
- ✓ Never skip sifting the cocoa; lumps will not dissolve in the batter.
- ✓ Ensure eggs and buttermilk are at room temperature to prevent the oil from seizing.
- ✓ Use a serrated knife to level the cakes if they have a slight dome.
- ✓ Pat the decorative cherries dry before placing them on the cream to prevent red "bleeding."
- ✓ Chill the mixing bowl and whisk attachment for 10 minutes before whipping the cream.
Adjusting the Recipe for Different Crowds and Occasions
When you need to scale this recipe, remember that baking is a chemical reaction, not just a math problem. If you are cutting the recipe in half for a smaller 6 inch cake, you should reduce the baking time by about 20% and start checking for doneness at the 22 minute mark.
For smaller batches, beating one egg and using half the weight is much more accurate than trying to "guess" half an egg.
If you are doubling the recipe for a massive party, do not simply double the baking soda and powder. Use 1.5x the leavening agents to prevent a metallic aftertaste, and work in batches if your mixer isn't large enough. Overcrowding the oven with six pans can also drop the temperature significantly, so you might need to extend the bake time by 5-10 minutes. For those who enjoy a variety of textures, you might also consider serving this alongside a Classic no bake cheesecake to offer a lighter, tangy alternative for your guests.
| Premium Ingredient | Budget Alternative | Flavor Impact | Savings |
|---|---|---|---|
| Kirschwasser (60ml) | Cherry juice + Almond | Loses the "heat" but keeps the fruit | $15.00 |
| Mascarpone (100g) | Cream cheese + Cream | Slightly tangier finish | $4.00 |
| Morello Cherries | Frozen sour cherries | Nearly identical when simmered | $3.00 |
Debunking Common Myths About German Baking
There is a frequent misconception that the Kirsch (cherry brandy) is just for flavor. In reality, the alcohol acts as a solvent that carries the aromatic compounds of the cherries deeper into the chocolate sponge. It also lowers the freezing point slightly, which helps the cake stay soft even when very cold.
However, the myth that you must use alcohol to get the right texture is false you can achieve a similar moisture level using a tart cherry syrup reduction.
Another myth is that you can't use frozen cherries. Many purists insist on jarred Morello cherries, but frozen sour cherries are often picked at peak ripeness and frozen immediately.
As long as you simmer them with the sugar and cornstarch to create that thick, glossy syrup, the final result will be indistinguishable from the traditional jarred version. The "science" of the filling is in the starch gelatinization, not the preservation method of the fruit.
Storage Guidelines and Sustainable Kitchen Habits
Storage: This cake lives its best life in the refrigerator. Because of the fresh whipped cream and mascarpone, it should not sit at room temperature for more than 30-45 minutes.
It will stay fresh and moist in the fridge for up to 3 days if kept in an airtight container or covered with a cake dome. For freezing, it is best to freeze the sponge layers individually, wrapped tightly in plastic wrap, for up to 2 months.
Do not freeze the fully assembled cake, as the whipped cream will change texture and weep upon thawing.
Zero Waste: If you have leftover cherry juice from the jar that didn't make it into the filling, do not pour it down the drain. Boil it down with a little sugar to make a concentrated cherry syrup for cocktails or to drizzle over morning yogurt. Any leftover chocolate shavings can be folded into a batch of Best chewy chocolate chip cookies for an extra hit of dark cocoa. If the cake scraps from leveling the layers are sitting around, crumble them into a glass with a bit of leftover cream and cherries to make a quick "Black Forest Trifle" for a snack.
Perfect Complements for Your Dessert Spread
To truly round out the experience, serve your Forest Cake with a side of lightly sweetened coffee or a glass of chilled dessert wine. The bitterness of a dark roast coffee highlights the Dutch process cocoa, while a Riesling can play off the tartness of the Morello cherries.
If you're hosting a larger gathering, having a variety of textures on the dessert table is key. While the Black Forest cake provides that damp, velvety mouthfeel, something with a bit of crunch or a different flavor profile works wonders.
A platter of cookies or a smaller fruit tart can provide a nice break from the rich, chocolatey layers of the main event. Remember that the best meals are those that balance the heavy with the light, the sweet with the tart, and the complex with the simple.

Recipe FAQs
What is the Black Forest cake made of?
It consists of layers of cocoa based sponge, cherry filling, and stabilized whipped cream. The build uses a buttermilk and cocoa cake base, a cooked sour cherry filling thickened with cornstarch, and a whipped frosting made from heavy cream, mascarpone, and powdered sugar.
What cake can diabetics eat?
No, this specific Black Forest cake recipe is not suitable for a diabetic diet. It contains high amounts of granulated sugar, powdered sugar, and all-purpose flour, which will significantly impact blood glucose levels.
What's special about Black Forest Cake?
It is defined by the contrast between tart Morello cherries and rich, dark chocolate. The inclusion of Kirsch, a cherry brandy, provides a distinctive floral depth that balances the sweetness of the whipped cream and mascarpone frosting.
What is the alcohol in Black Forest Cake?
The traditional alcohol used is Kirsch, also known as Kirschwasser. This clear cherry brandy is stirred into the thickened cherry filling to add an authentic flavor profile to the dessert.
How to ensure the cake layers bake evenly?
Preheat your oven to 350°F (175°C) and use three 8 inch round pans. Divide the batter evenly between the three prepared, parchment lined pans to ensure consistent height and baking time, checking for doneness with a toothpick after 30 minutes.
Is it true I should store the assembled cake on the counter?
No, this is a common misconception. Due to the fresh whipped cream and mascarpone, the cake must be refrigerated and should not sit at room temperature for more than 45 minutes.
How to stabilize the whipped cream frosting?
Whip the cold heavy cream, mascarpone, powdered sugar, and vanilla extract until stiff peaks form. Using cold mascarpone with the heavy cream acts as a stabilizer, ensuring the frosting maintains its shape on the cake layers while chilling in the refrigerator.
Authentic Black Forest Cake
Ingredients:
Instructions:
Nutrition Facts:
| Calories | 696 kcal |
|---|---|
| Protein | 6.5 g |
| Fat | 36.1 g |
| Carbs | 72.7 g |
| Fiber | 3.2 g |
| Sugar | 51.8 g |
| Sodium | 448 mg |
